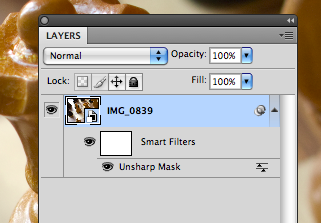
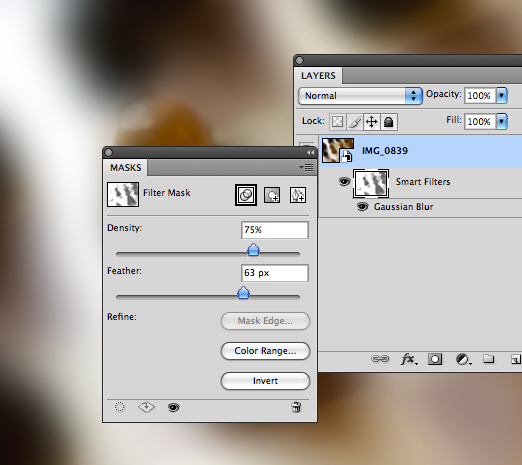
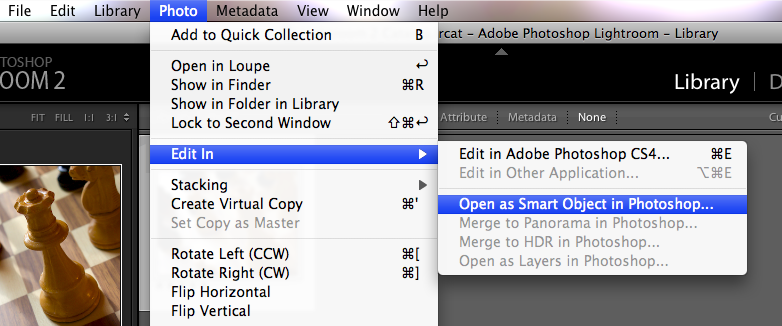
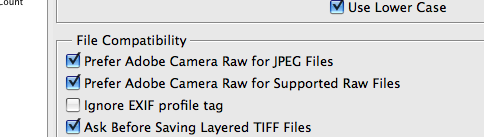
Tuesday, October 21, 2008

Cropping Strategies

If you’ll notice, you get two places to crop in the Smart Object workflow- once in Camera RAW, and the Crop tool in Photoshop. It get’s kind of confusing when you get in there and start cropping, especially considering how Smart Objects get “Placed” into the layers of an image. There’s one little secret that helps. Cropping in Camera RAW crops the object. Cropping in Photoshop crops the Canvas. Let’s take a look.

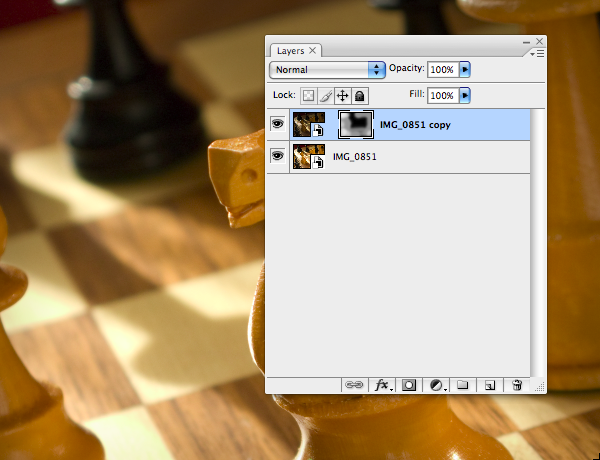
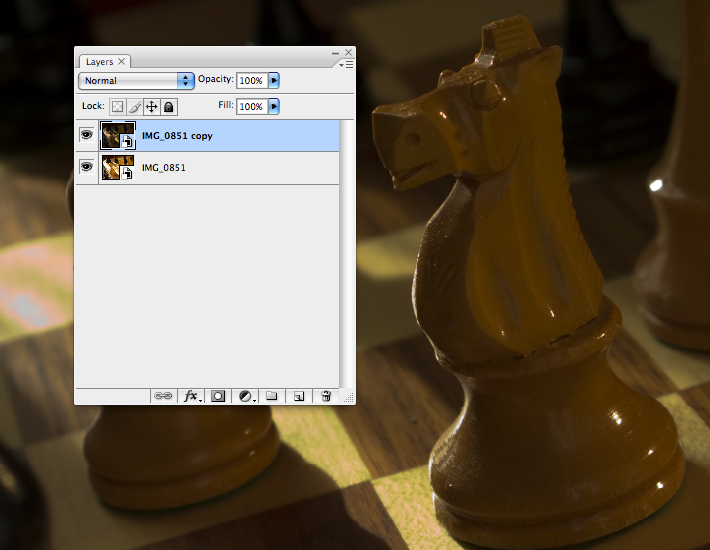
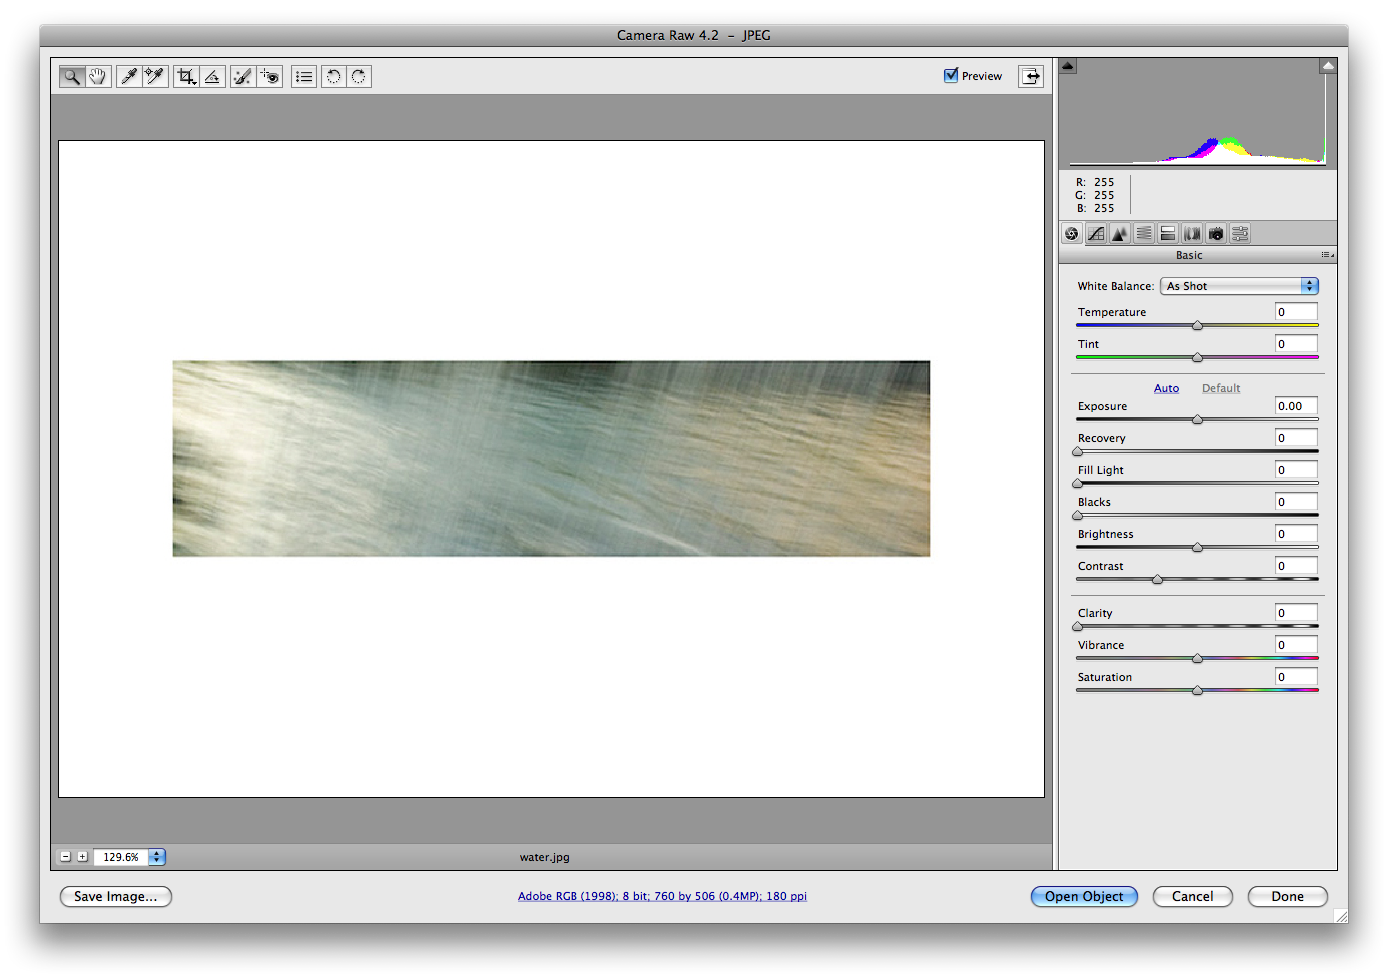
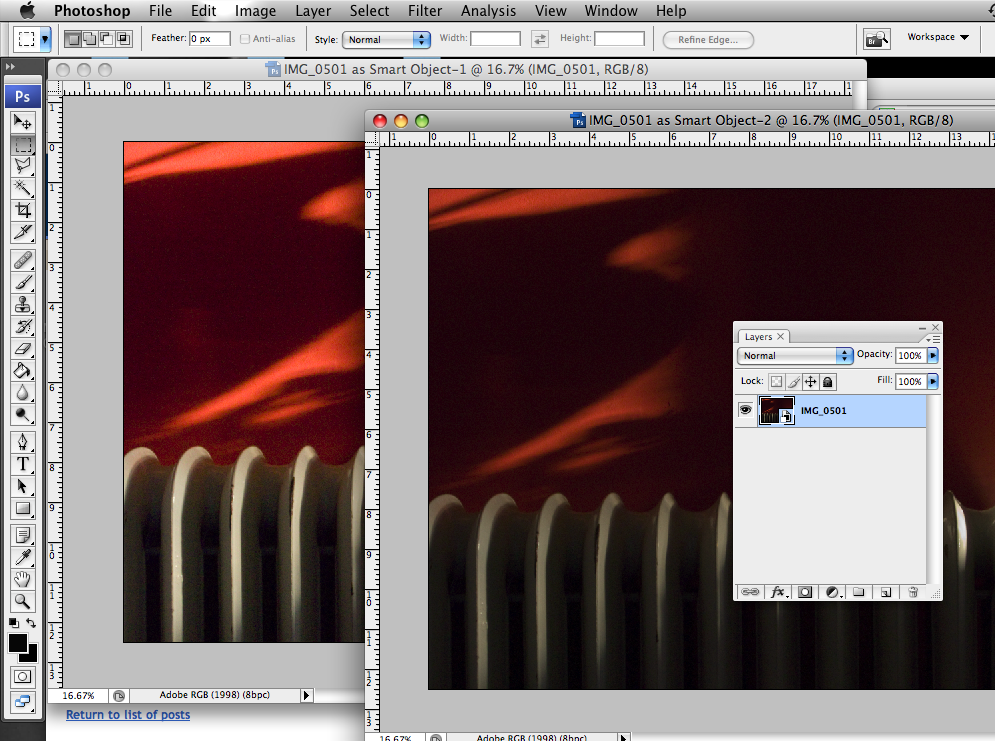
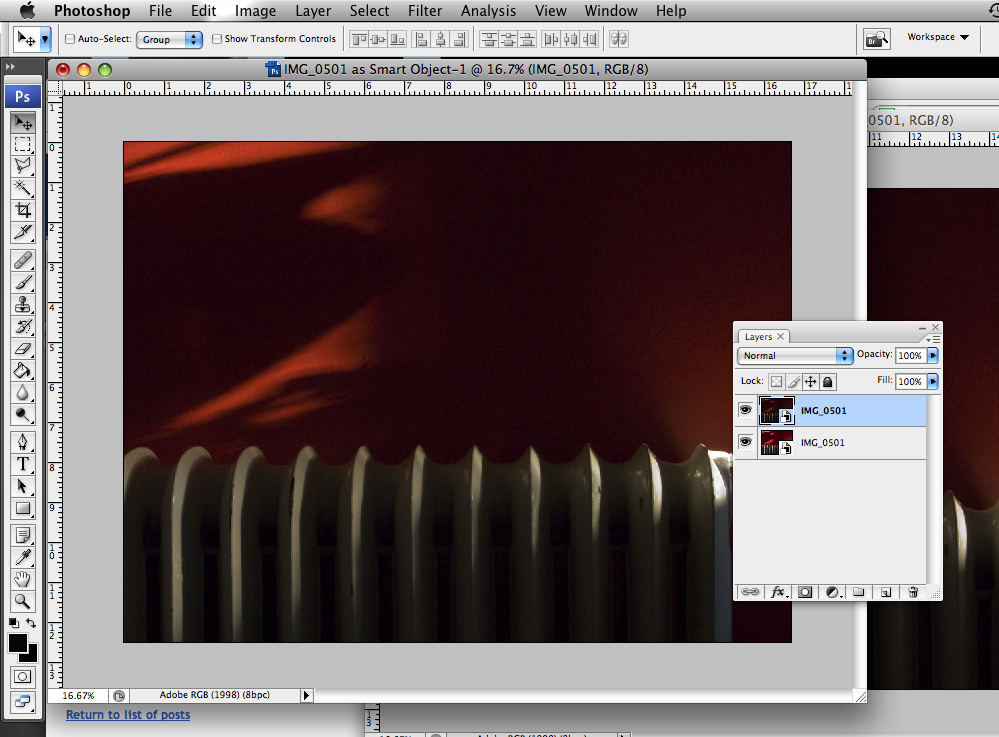
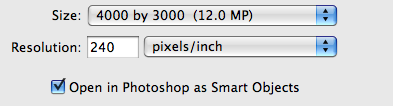
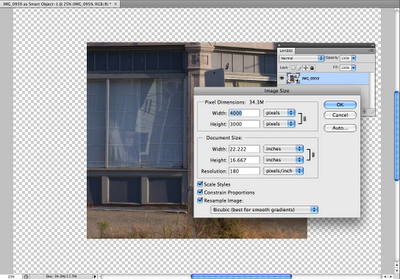
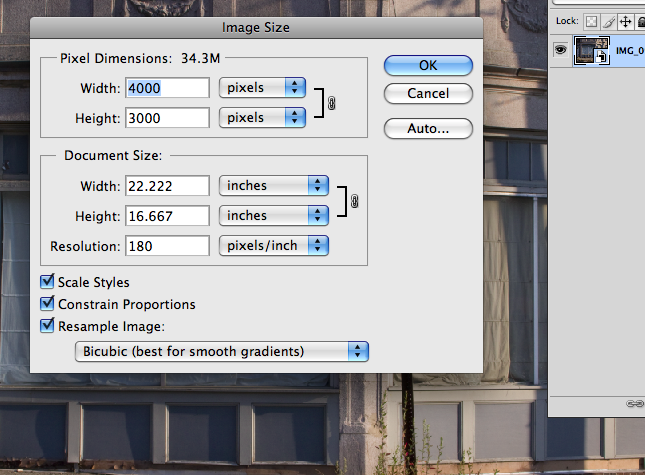
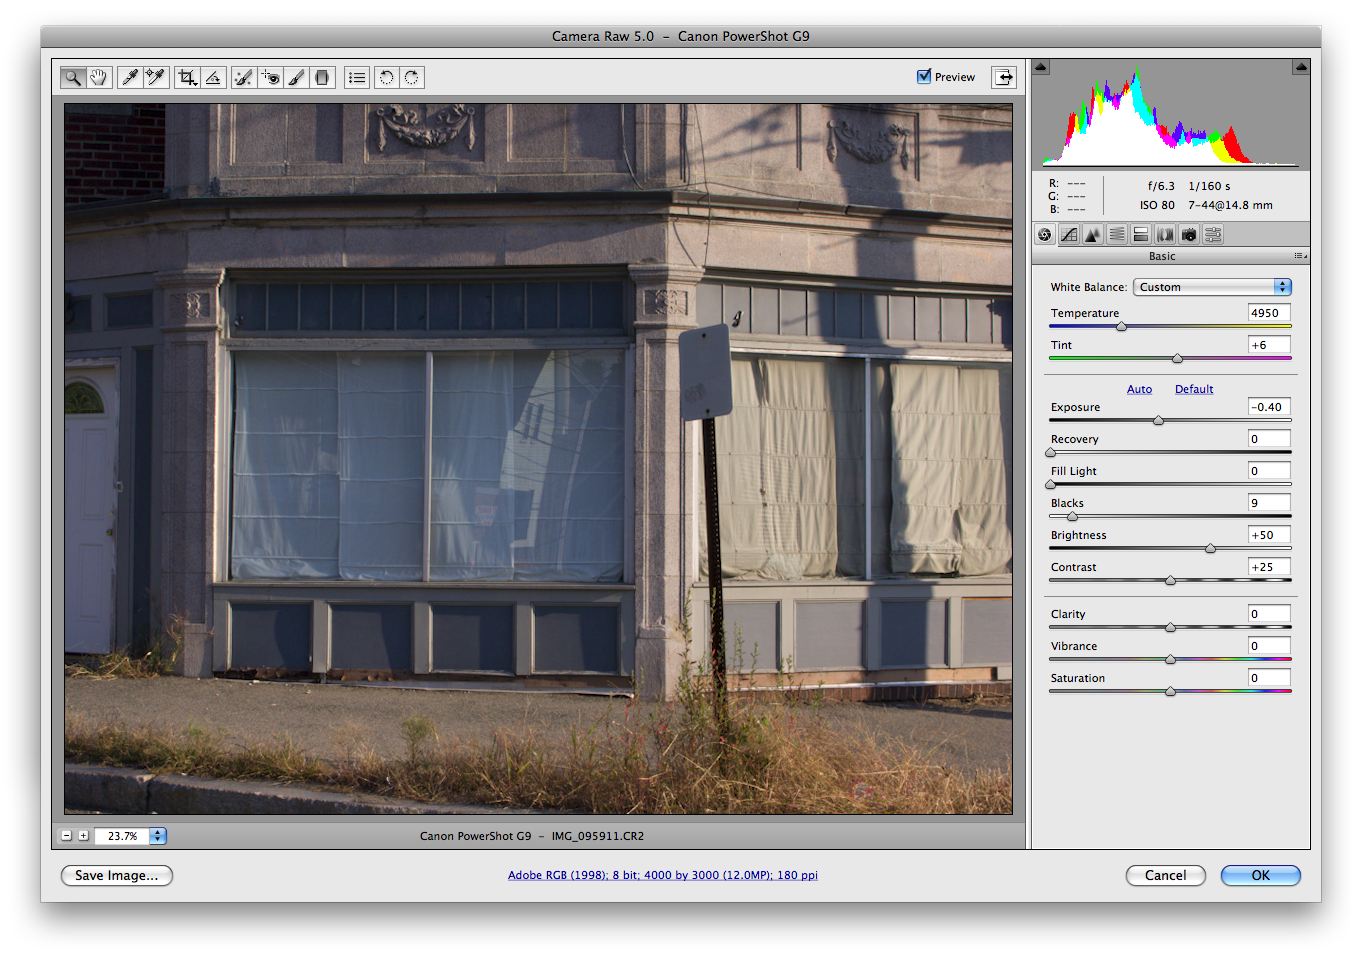
Here I’ve opened a full, uncropped image into Photoshop, and it creates a Canvas that is 4000 x 3000 pixels.


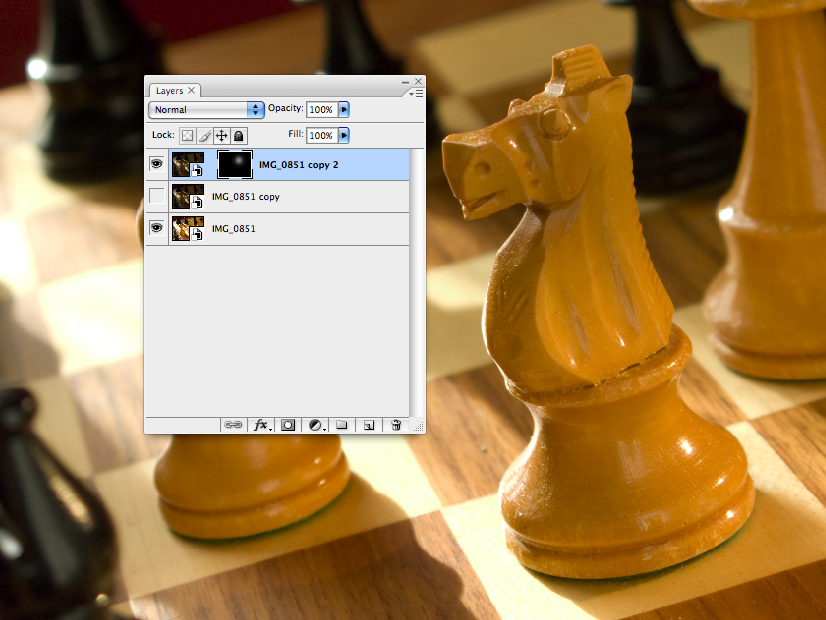
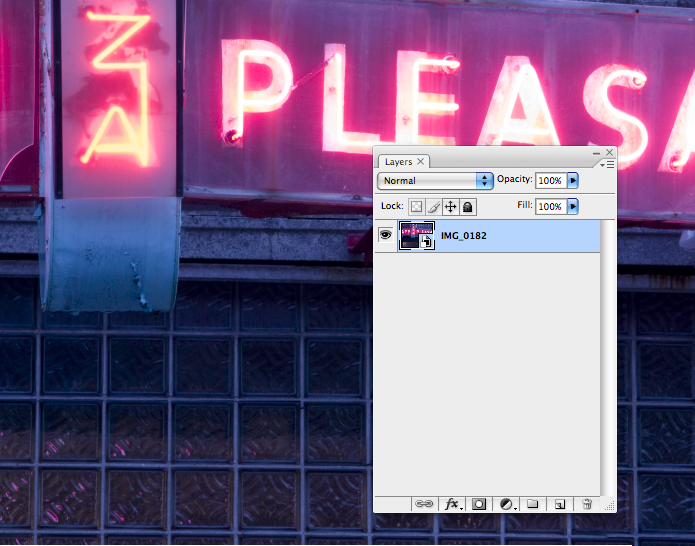
If I go back into Camera RAW and apply a crop, the Canvas size will stay the same, but the object will show as cropped within that canvas. Here’s what that looks like, the blank Canvas is the checkerboard pattern, and the Image Size is still 4000 x 3000.


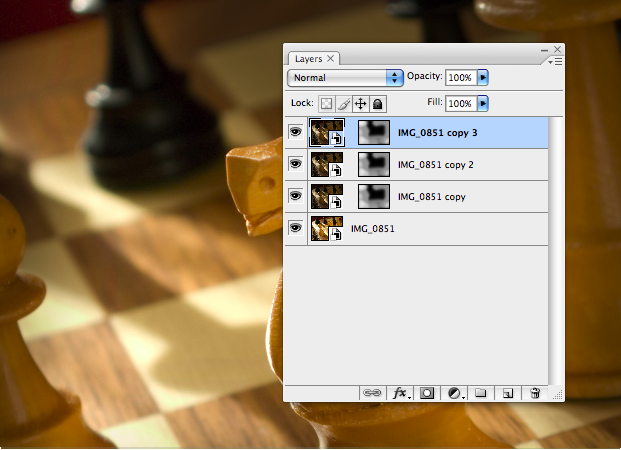
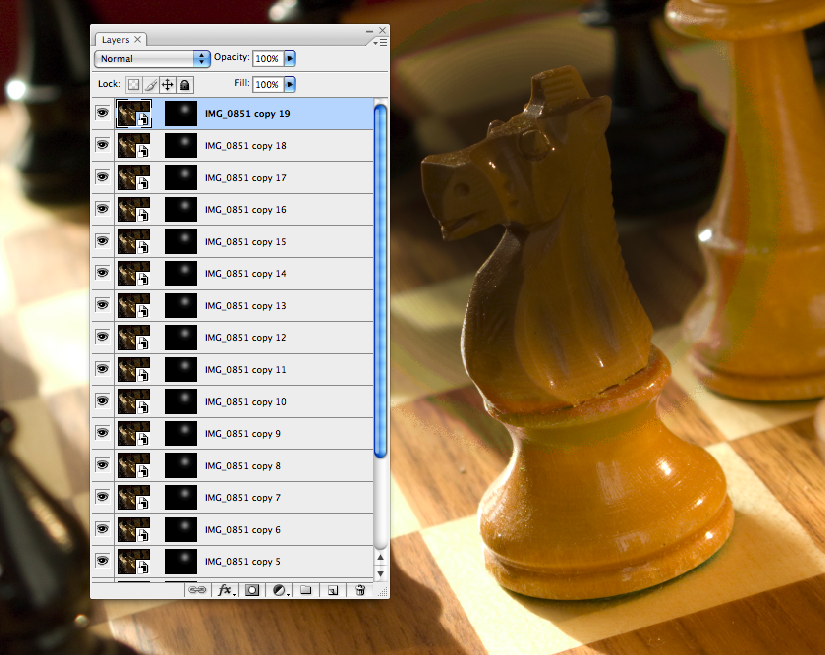
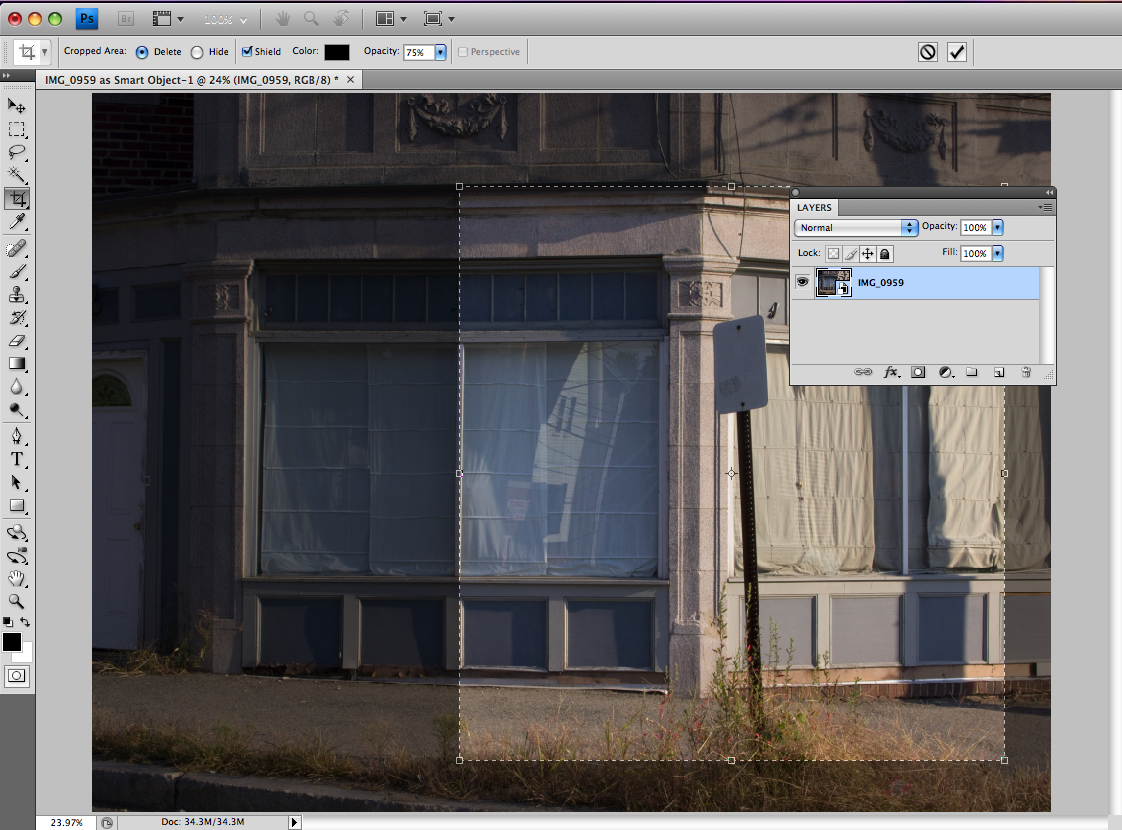
I can always re-open the Camera RAW dialog and re-crop. This time I’m cropping using the Crop Tool in Photoshop.


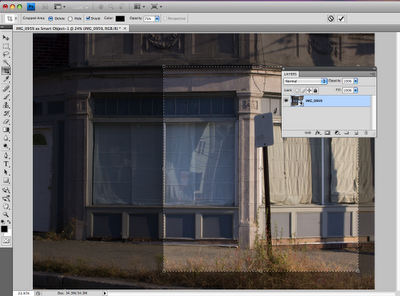
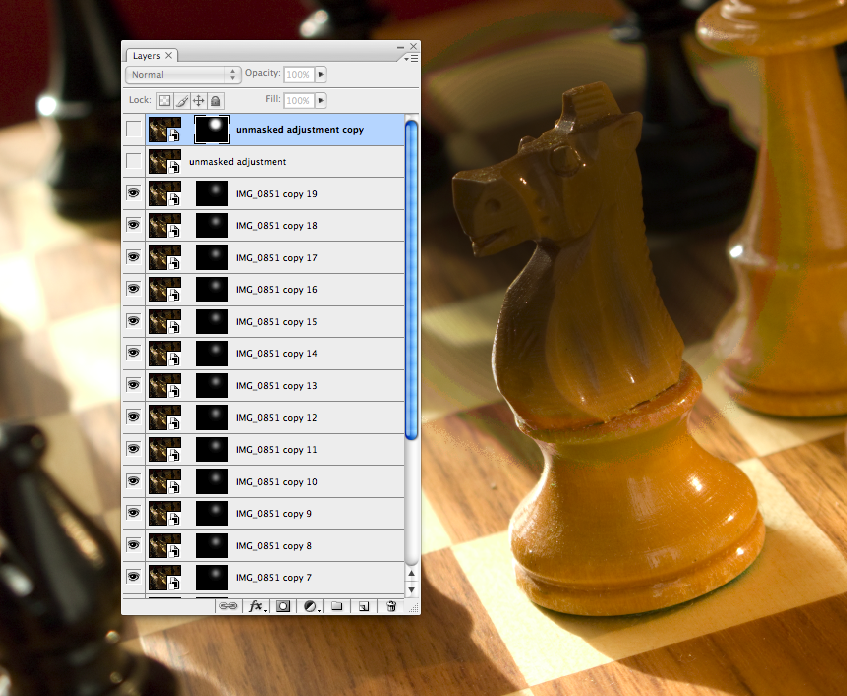
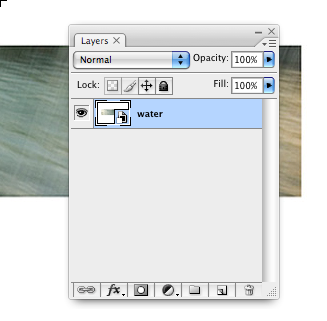
This crops my Image, or Canvas.


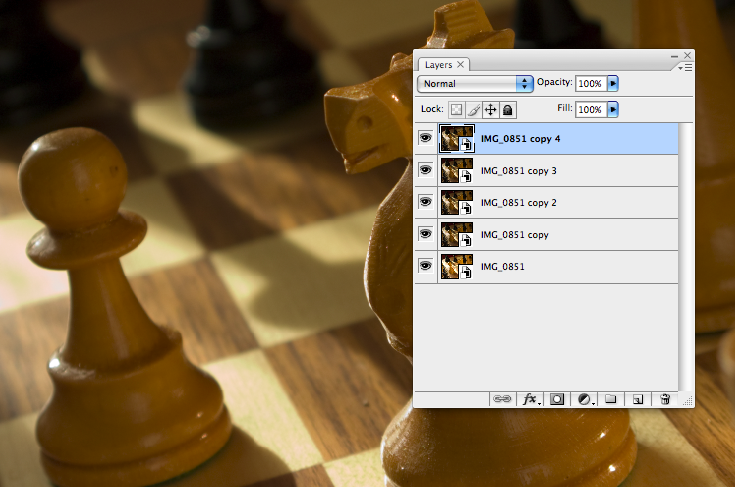
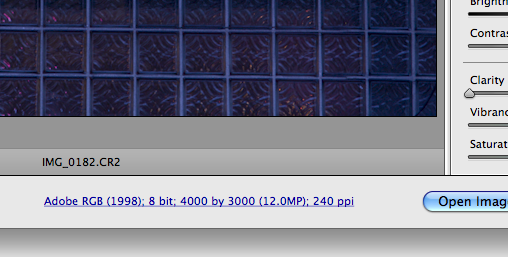
If I re-open Camera RAW I can see my whole image, uncropped.


This gets kind of weird, especially in terms of your ability to go back and re-do your cropping work and the non-destructive process. You can, with either method, backtrack and get back to your starting point... if you crop your Canvas you go Image>Reveal All and you get back to your full image. If you start with a cropped RAW file , it will build a Canvas that size, and you have to go back to the RAW dialog, re-crop or remove the crop, then, in Photoshop, do the Image>Reveal move.

If you crop in your Camera RAW panel, you then have your blank Canvas on the outside of your crop which I find distracting. If I do my basic Crop there, and then, once I’ve decided that’s what I want, I’ll then do a “clean-up” crop in Photoshop to get rid of the excess Canvas. (I can always get it back if I really want it.)

After going back and forth on this for a while, I really think the best standard process is to use the Crop Tool in Photoshop for almost everything. The Reveal All move gets us everything we started with, and it's easy and fast. Any other way may be fine for the purpose at hand, but will set up some issues, not big ones, but issues nonetheless, later.

Labels: ,

Saturday, October 18, 2008

Smart Filter Masks- (from Smart Object Pipeline)

When you make a Smart Filter on your Smart Object layer, you get a mask generated automatically. The white rectangle labeled “Smart Filters”, between the Smart Object on top, and the filter on the bottom, is your mask. This is separate from the filter, and will, for the most part, behave like a regular layer mask that we know and love with a few notable exceptions.

The first little surprise is that you can only use one mask for each Smart Object Filter set. I can add more filters, but they’re just going to sit under that top mask.

I can control the masked areas of the filter just like I do with a regular mask, either by painting on it as I usually do, or even by making a selection and making a mask. The trick there is you have to start by making the selection before you make the Filter. Here, I’ve made a selection from Select>Color Range.

Next I make a Smart Filter for Gaussian Blur.

Here is my happy mask.

I can make the usual moves here, including Command I to invert the mask, as well as accessing the CS4 Mask Panel to do some nice, controlled refinements of my mask.


Finally, you can move and copy Smart Filter masks from layer to layer, just as you can with regular masks, by simply dragging them to the layer you want to move them to, or Option-dragging them to make a copy rather than a move, with one little restriction: you can only copy a Filter Mask to another Filter, and a Layer Mask to another Layer. The “Filter Effects Mask” and the “Layer Mask” are two different animals, and can’t be interchanged.

This does give you an interesting little workaround, though, if you’ve made a Smart Filter and decided afterwards you want to mask it using a selection. Just make a new Smart Object layer and make your selection and make any filter at all.

Then just move your mask to your first Smart Filter. You’ll get this warning.
It moves that nice mask to your first filter,

and then you can just trash that second “working” Smart Object Layer you made.
Bingo, game over!

Labels: , ,

Friday, October 10, 2008

Smart Objects in Lightroom2


OK, one more post before cocktails and the Sox.

You like Lightroom2, but want your Smart Objects?

From the Library, Photo>Edit in...>Open as Smart Object in Photoshop

(Aperture? nuthin.)

Labels: ,

Thursday, October 9, 2008

site: Shoot RAW Smart Group on Yahoo

I've started Shoot RAW Smart on Yahoo, to help answer questions, support and advance the Smart Object workflow, and offer a place where you can make your contributions to the process.

Why let Rosenholtz and Sanchez have all the fun?

Visit here, and join up!

Labels:

Saturday, October 4, 2008

GEEKZONE: The Rosenholtz-Sanchez Effect Explained

(...a little tease from Smart Object Pipeline)

We’ve been talking about this effect, what is it, really?

There are a couple of ways that Smart Object Layers seem to compound an adjustment. Basically, this applies to copying a layer that you’ve applied an adjustment with a mask to.

If I start with a layer, then make another Smart Object on top of it, I’ll get a solid, self-contained layer that has edits that only apply to itself.


In this case I’ve adjusted it darker, to burn down the perimeter. Now, I make a mask, and “burn” down the areas I want. If I now copy that layer, it will appear to compound the adjustment, making it darker still. If I keep copying the latest, top layer, it just keeps getting darker and darker. Here’s what three iterations of that looks like:


It’s simple really. Each “Smart Object via Copy” move uses the source layer as it’s starting point, and applies that to the overall image. The moral of this story? Be really careful of which Smart Object you’re copying, and how it’s propagating adjustments. To be safe, I usually copy only from the first, or Background layer.

Something is fishy here, though. If you make a straight, unmasked darker Smart Object layer and make several copies on it, you’ll notice it doesn’t get any darker. If the edits get compounded, then why isn’t this compounding here? Go ahead, try it.


Here’s a basic “dark” move, copied a bunch of times. The result is no darker than the first edit.

Here’s the thing. The “Smart Object via Copy” move compounds the mask, not the edit. Here’s a basic image, and a very dark adjustment on top.


Now I’m going to hold that back (by turning it off for the moment) and make a copy with a mask, using my standard 50% flow and 50% opacity settings, and I’m just going to hit it lightly. Here’s what it looks like.


(I named it “unmasked adjustment” to keep it straight.) OK, I just hammered out a bunch of copies of the masked layer until it didn’t get any darker. After 19 layers, I have the same tonal value as the unmasked layer. (Here’s the 19th layer,


and here’s the dark layer moved to the top.)


Each “Smart Object Layer via Copy” move compounds the mask, moving it to more and more transparent… it basically is like painting on it with the 50%/50% brush over and over, 19 times in fact, until it shows 100% of the Smart Object it’s masking.

Want to see something funny? Here


is what my 19 copies looks like. Here


is what it looks like when I hit my mask 19 times with the same 50%/50% brush setting. The spread of the mask is a little different, but the density of the edit is the same.

It feels, when you’re working with Smart Objects and Smart Filters in a masking workflow, like there is some magical mechanism going on and the edits, filters and adjustments you’re making can get out of control.

Keep this in mind. It’s not magic, it’s the mask.

Labels: , , ,

Sunday, August 24, 2008

Smart Objects Gone WILD


Here's a peek at the inner workings of my tortured soul.

I've been throwing ideas around for cover shots for the Smart Object Pipeline, and shot a few dozen images of this lightbulb. This image is the result of 4 files layered as Smart Objects. I think the final file is in the neighborhood of 300MB (so far...). ...and how about THEM apples, for dynamic range? (Take THAT, Mr. "HDR".)

Labels: , , ,

Saturday, July 26, 2008

Into every Life, a Few JPEGS Must Fall...

Even if this isn’t your first foray into the world of RAW shooting, you are going to run into some JPEGS you have to work with. You may be tempted to stray from the Smart Object process, to go back to your old ways, with either straight adjustments, or adjustment layers. (I can see one of my, well, “favorite” students going “OOOO! OOOO! SEE? It doesn’t work for EVERYthing!”. You know who you are, I’m not printing your name here, I don’t want to encourage you.)

Well, watch this.

Photoshop>Preferences>File Handling


Select “Prefer Adobe Camera RAW for JPEG files”.


Go open a JPEG.

Snap! Now, whenever you open a JPEG, it will open in Camera RAW.


All the usual rules apply. I hit “Open Object” and I got me my happy Smart Object layer. See Seth? (OOPS!)


OK this is a little misleading. You still are working with a JPEG, this is nothing so magical as working on a RAW file, and the JPEG is subject to all the usual restrictions and problems. Anything you do to it, whether through the normal adjustment process or through Camera RAW, is going to be destructive. You’re not going under the hood and working any magical secret sauce here. You’re just working in Camera RAW to apply the adjustments you need, rather than Levels and Curves.

I had a long chat with one of the guys at Adobe about this, and tried to figure out what this meant and why they did it. His answer was that they were just trying to give us an option for working with JPEGs if we liked the “handles”, or controls, of Camera RAW. It standardizes your process, and the Smart Object workflow is a great example that. Not only does everything work just as if it was a RAW file, but I can go back and re-adjust that, just as if it was an adjustment layer, since it’s a Smart Object.

OK, well, it doesn’t work with TIFFs. Or anything else. (sit down, Seth.)

Yet.

Labels: ,

Friday, July 25, 2008

Book Updates: Smart Object Pipeline draft is in!

The Smart Object Pipeline manuscript just went to the Editor! Here's the intro:

Welcome to the New World of Smart Objects!

Smart Objects let you, for the first time, get right back to the RAW file in a seamless, efficient processing path – the Smart Object pipeline. You can use all the power of RAW processing, a constructive editing process, getting to the “digital latent image”, the unprocessed data that first hit the camera’s sensor, at the click of a mouse. Coupling that with a solid Layers and Mask workflow gives you an all-new, and remarkably powerful way to get the most out of any camera’s file.

This is a new process, but it is a fully evolved and complete process. Of course, it means changing the way you work. Most of the classes I teach are fairly advanced photography students, and by now everyone has a pretty solid footing in Photoshop. I usually start out my classes by saying, “…bear with me. I know you have your Photoshop skills well established, you have your favorite methods, and that’s great, but for this semester, I want you to do it my way. After that, after you learn the whole system, after this class is over you can go back to whatever your favorite tools and processes are.” (Doesn’t that remind you of your mother? “While you’re living in THIS house, mister…”)

Well, here’s the thing. I learn this stuff mostly by the “hacker” method. I tear into the program, try out stuff, sometimes I break things, most times not, and that’s how I learn. I often reference books like this, or, my favorite over the years, the late Bruce Fraser’s “Real World” series when I get stuck. This method is a long, random road to a good, solid set of strategies. Sometimes, left to hacking alone, you never get there.

I’d be looking over someone’s shoulder and see a new way to do something. I had more than one designer see me do what I always do, and say, “Why the heck are you doing it THAT way?” I’d listen to speakers, attend workshops, watch how students are doing things, and realize there is a faster, better, and more professional way to work. Unless you’re looking for a better way, you’re going to get stuck in your own habits, and that could be costing you a lot of time, and a lot of freedom.

The other part of this is that, throughout the development of a remarkable tool like Photoshop, the thing simply does not work like it did when you started learning it. I learned Photoshop on version 3. (I started on this stuff just to make a web page. I never thought it would set me free of the darkroom!) Most of the tools, including RAW processing, Layers, Masks, and even fundamental Color Management, did not exist. As these tolls evolved I was forced to re-learn my processing. As Photoshop continues to develop, you’ve got to re-examine your old ways of working. There's a point where you have to consider stepping back from your old habits and methods, and take a fresh look at where the system is today.

The Smart Object process is still evolving and being refined, but for the most part is a complete, mature way to work, using the highest levels of methods, and the core philosophy of the Adobe “Non-Destructive” workflow. My challenge to you is, bear with me. Let me take you through the foundation of this process, the RAW file, layers and masks, and show you a few working strategies that I use. Try it out for yourself. It’s a new way to work, and it means you’re going to break a few old habits and develop some new ones. This process is based on a very select set of tools, yet can be used for virtually any task a photographer needs to create and process remarkable images.

Remember, this is all new, and also keep in mind where we are in the history of Photography - at what I often argue is the most profound point in the entire development of photography, the RAW digital file. This has changed the way we see, the way we create, and the processes we use. Like the introduction of 35mm film, the RAW file has introduced a different way to make a photograph, and we have to learn new methods to handle that. The Smart Object process gives me a better way to get at that RAW file.

Ansel Adams, a photographer with a remarkable vision, yet also a consummate technician and teacher, said:
"I believe that the electronic image will be the next major advance. Such systems will have their own inherent and inescapable structural characteristics, and the artist and functional practitioner will again strive to comprehend and control them."

He said this in 1981, shortly before he passed away, but this belied his constant effort to stay on the very forefront of the photographic process. Even then, photography demanded a constant attention to understanding the latest tools, techniques and materials, and that is truer now than ever.

I don’t I feel this is a process that is only for the “Advanced” user. I’ve started beginner classes in Photo 1 right out with RAW file processing, Layers, Masks and Smart Objects, and they pick it up as fast, or faster than the basic Adjustment Layer process.

So, step right up, leave your preconceptions behind you, and enter the Smart Object Pipeline!

Labels: ,

Sunday, June 29, 2008

Copying Smart Filter Layers

We’ve seen a few examples where we need to make a filter on another layer, pretty much the same as one we’ve already made. The good news is we can just copy existing Smart Filters in much the same way we copy other things in Layers. But, like in other little features of Smart Objects, there are a few new twists you have to watch out for. Here’s an example.

I’m going to open a file, and run through my usual procedure of building my working Smart Object layers.


Let’s keep it simple. I’m going to “burn” down the iris, and the eyelashes a bit here, so I’ve gone in and made the adjustment and masked it for just those parts.

Now I want to get it ready to print, so I size it and do my Unsharp Masking adjustments remembering to turn the images above the “source” image off.


Next, I have my problem. There are some areas of the Smart Filter I made that are going to get covered up by the “burn” layer above it. The "burn" layer isn't going to get sharpened by the layer below it, so I need to make another Unsharp Masking layer, probably just like the one I just did, to plug into that "burn" layer. Here’s how I can do it. This is what I’m starting with- a “burn” layer with the Unsharp Mask Smart Filter turned off (the “eye” on the Unsharp Mask is clicked, to de-activate it, thus not showing the “eye” anymore.)


Go back to the “source” layer and click on the Unsharp Mask Smart Filter. Hold down “Option”, click that baby and drag it to the “burn” layer, and drop it right on he (de-activated) Smart Filter. Snap! You’ve added a copied Smart Filter layer, exactly the same, from your “source” layer.


Note that there are two “Unsharp Mask” layers, and one is de-activated (no “eye”). You can actually go ahead and delete that to keep things neat if you want.

One important, really small detail. Make sure, when you start, the thing you’ve turned off (in your target layer) is the filter itself, NOT the thing that says “Smart Filters”. Look again at the figure. The “eye” is there, next to the “Smart Filters”, but not next to the Unsharp Mask. This will help keep things straight, because it adds a new filter that has the eye, and shows the old one that is turned off. (If you turn off the “eye” next to the Smart Filters thing, then it will add the filter, but activate ALL the layers. Just a bit confusing.)

The only thing left to do is to go back and check your sharpening levels. Remember the Rosenholtz-Sanchez effect! You’ve applied the same filter twice, on two layers, so the effect will be compounded. You can quickly check it simply by toggling the new filter on and off, and see if it’s objectionable, or, you can go in and re-open that filter and give it a poke. (If it’s a problem, Rosenholtz and I have pretty much decided it’s Sanchez’s fault. But that’s another story.)

Labels: , , ,

Friday, June 27, 2008

Combining images pixel-for-pixel

This is an old trick, but one that now gives you another method of adding Smart Objects as Layers. It's the old Shift+Move move.

Open two images as Smart Objects. Grab one. Hold down Shift, and, with the Move Tool slam that baby on to the other Object. Bingo. Pixel-for-pixel registration.

This is especially useful if you're trying to get to high dynamic range images (HDR) using Smart Objects and masking. Grab two exposures in Bridge, open them and process them in Camera RAW, one for the highlights, one for the shadows, bring 'em into Photoshop and Shift+Move.

badda-BING.

Labels: , ,

Wednesday, June 25, 2008

Setting up Camera RAW for Smart Objects


We need to get to Adobe Camera RAW to set that up to open files as Smart Objects rather than standard rasterized images. To do this, just get to a RAW file and open it (preferably using Bridge). Here’s the familiar Camera RAW window. At the very bottom in the middle is what looks like a link on a website. Here’s what mine looks like:


Click it. This brings you to the Camera RAW “Workflow Options”.


Here you can specify some of the key processing preferences, specifically, the Working Color Space you’re asking Camera RAW to process to, the bit depth, pixel dimensions and resolution of your processed files. There’s also a little checkbox: “Open in Photoshop as Smart Objects”. We want to check that little guy.


You’ll notice, after you hit OK, that the “Open …” button now has changed from “Open Image” to “Open Object”. After you make your basic adjustments in the Camera RAW menus, hit this button and you’ll kick into Photoshop.

Here’s your happy workspace, with your image (now temporarily named “'filename' as Smart Object”) and your Layers Palette that you’ve set up, and the background layer with this funny little icon on the layer. THAT, my friend, is your Smart Object.


Now, whenever you open a RAW file it will go into Photoshop as a Smart Object Layer. The enormous power of this is revealed when you go and double-click that funny little icon. Go ahead. Try it. You know you want to. Bingo! What happens is you get right back to that Adobe Camera RAW window. All we really have done is set it up so we can go and edit the RAW file, and re-edit it, without having to get back out of Photoshop and start again with the original file. We now have a RAW file embedded into our Photoshop file as a layer.

Seems simple enough, this is the “nut” of the process, but, as the saying goes, “Mighty Oaks from Little Acorns Grow”.

Lets see what this lets us do. More to come...

Labels: , , ,

Sunday, March 30, 2008

Smart Objects: getting to dynamic range


Here, I'm using Smart Objects... I've started with three exposures, 2 stops apart.


I open the first one, and "Open Object" (see previous Smart Objects posts for details...) Then I go to Bridge and select one of the brackets, and go to File>Place>Photoshop. This opens that file, as a Smart Object, into the open file in Photoshop. I do it again, and have all three files there as Smart Object Layers.

Now I can mask them to burn and dodge them... starting off with all the exposure values from my 6-stop exposure bracket range. I have all the control of Layers and Masking, with the ability to go back and edit the RAW source file because of the Smart Object. I can fine-tune the value, the color, the sharpening and the opacity and blending of the Layer, too.

Labels: , , ,

Saturday, March 29, 2008

HDR processing: down the rabbit hole...

HDR is "high dynamic range", and is a processing method to combine several exposures, of different exposure ranges, to create one file with a gi-normous dynamic range.

The first place I saw this was with Leaf software, very early on... you could take the RAW files in Leaf Capture, and merge them to one HDR file. This was particularly useful when shooting computer or video displays, or shooting interiors with windows.

The problems has been, and continues to be, (as far as I have seen), the lack of control in selecting what highlights, and where, are included, and the lack of a re-editing strategy, that is, you can't go back and change anything after you've made the HDR. Imacon, a little later on, allowed you to select several exposures and process them to one file, in layers to work with in Photoshop... a much more practical approach from where I sit. Using masks and layers I could select what and how much of an area or value I wanted to include in a shot.

Then came the Smart Objects. No surprise there, huh? If I take several exposures and build them into my layers and mask them, I have all the dynamic range I can stand, plus, the so-called "non-destructive editing" workflow. Where all the HDR processors I have seen make one huge file, in ultra-high bit depth, that you can use as a source for all your edits, the Smart Object workflow lets me use the same workflow I'm using for everything else... Smart Objects, Layers, Masks, and build in every bit of detail I want, in just the way I want to...

Later on I'm going to show what I mean... look for an HDR to Smart Object workflow comparison coming soon.

Labels: , , , ,

Sunday, March 23, 2008

Smart Objects and RAW files

Very briefly, a Smart Object is a sweet new device that allows you to get back to all the original qualities of the original file. You can use it for all sorts of files, but we are going to use it for RAW files.

It’s really pretty simple. The Smart Object sits as a Layer in your image. You get to it by double clicking the icon, and it re-opens the Layer as the RAW file it was originally. Here’s how to do it.


Open a RAW file. When Photoshop opens it, it will open the Camera RAW dialog. At the very bottom of the Preview window you’ll see what looks like a webpage link… that is the button to your workflow options. Click it.

There you will see the box “Open in Photoshop as Smart Objects”. Check it.


Now, when you hit OK and go back to the Camera RAW screen you’ll note that the “Open Image” is now saying “Open Object”. Hit “Open Object”.

You will be transported to Photoshop’s main screen, where, with your Layers palett open, you’ll see your image with this cute little icon. Double-click that icon, and you are right back to Camera RAW and your RAW adjustments.
How cool is that?


The Smart Object workflow is actually a huge subject. Basically, they are Layers and you can do anything to them that you can do to any other adjustment or image layer. My book on it is due out shortly following this one… Yes, a book on Smart Objects. For now, though, I give a more detailed explanation and examples of workflows in my book “Raw Pipeline”.

Labels: , , ,

Sunday, March 16, 2008

Resizing Strategies... and Smart Objects

With all the recent developments in Photoshop and all, it seems like
the final word on resizing comes down to two camps. There's the group that swears by the "resize using the printer driver (or RIP)" method, and the ones that just use Photoshop and Bicubic Smoother and Sharper. I'm trying to work out the best method for resizing in a Smart Object workflow, and here's the issue.

When you are working with Smart Objects and you resize, or crop, and
then try to make more Smart Object layers, things get, well, wonky.
Something about the Smart Object is dimension-dependent. To Place the Object, it has to go into a "target", and things are a lot simpler if
the target stays the same dimensions. Once you resize, you've kind of
committed to a version of your file.

The other issue is that I feel it's important to sharpen the file at
"Print Size", that is, to view the file at the size it will reproduce,
all the pixels where they should be, so you can see if it will look
good coming out of the printer.

The Smart Object workflow I've been using is to get the file into the
ballpark, size-wise, in the RAW processor, under the "Workflow"
options. This gets me close, and then I can happily work away, making more and more Smart Object layers that fit just fine. I can then sharpen, using Unsharp Mask, and be pretty sure I'm doing it
appropriately, for the size of the image.

Finally, I'll use the printer driver settings to get my image to a
precise size.

The cool thing, of course, is after I've made this print, if I don't like the sharpening I've applied, I can go back and change my Unsharp Mask settings, since my USM filter is a Smart Filter.

Note: Beware the Rosenholtz-Sanchez effect!

If you are applying several layers of Smart Objects and Smart Filters, masked, they ARE CUMULATIVE. That is, if you have layers with sharpening that overlap, you will be sharpening them twice. I'm all about spot sharpening now... I hardly ever see the need, or the advantage, of doing a global sharpening to an image. You almost always are hitting some area of noise or something that just shouldn't be sharpened. I'm always masking the filter, and I'm just very careful that my masks for different layers don't overlap.

Labels: ,