The Shoot Diary- PhaseOne C1Pro v.4
Back in the day, PhaseOne built a medium-format digital back system that set the bar. Every manufacturer- digital back and DSLR, had some variant of the basic process- control the camera, control the workflow, control the colors, process and output the files. As the systems evolved, they all began to resemble one original, and powerful package- PhaseOne Capture.
When the leading DSLR manufacturers were offering software that was billed as professional, but resembled more of a consumer product, PhaseOne saw the need to step up where the OEMs were missing the boat. They introduced C1Pro- adapting their rock-solid software to the professional DSLR market. As they had with the MF DB market, they set the bar for the camera companies, and changed workflow for everyone.
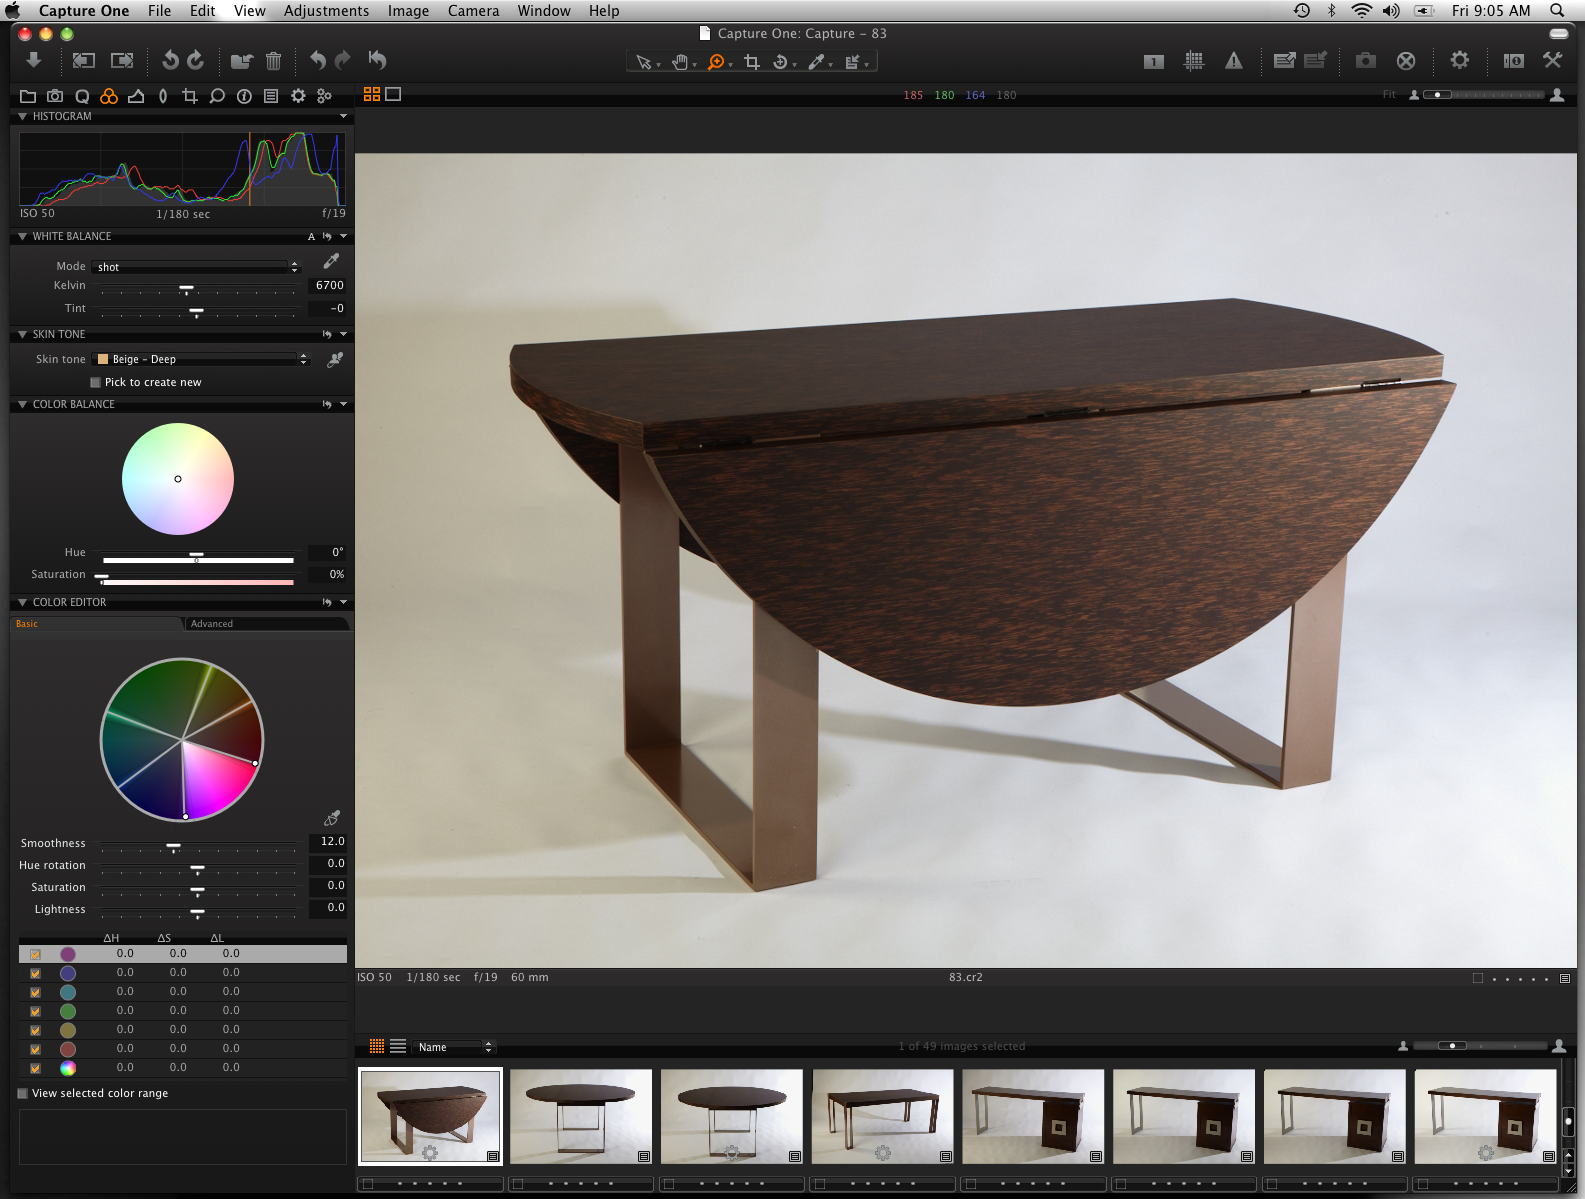
It’s been a while since I’ve taken a look at C1Pro, but I had a big shoot with a Canon 5DM2 that I needed to tether to my laptop. I thought it was a great chance to revisit C1Pro. Ironically, I was using it for the same reason I looked into it when it first came out- rather than simply process the files, I needed to shoot to the workstation with a DSLR and move fast. Photoshop couldn’t do it, the manufacturer’s software was too flakey, I needed a MF DB solution: C1Pro was the natural, well the only, choice.
Let me first say I was delighted to plug the camera in, turn it on, and immediately get a solid connection in C1Pro. I was concerned, from reports that there were issues with new operating systems (I’m running the latest version of OSX, historically, a practice that is asking for trouble with some Phase versions in the past) as well as a new camera model. Oh. Did I mention this was at the job, with the client there, with no room for error? The processing path was seamless, and easily set up to suit my standard habits.

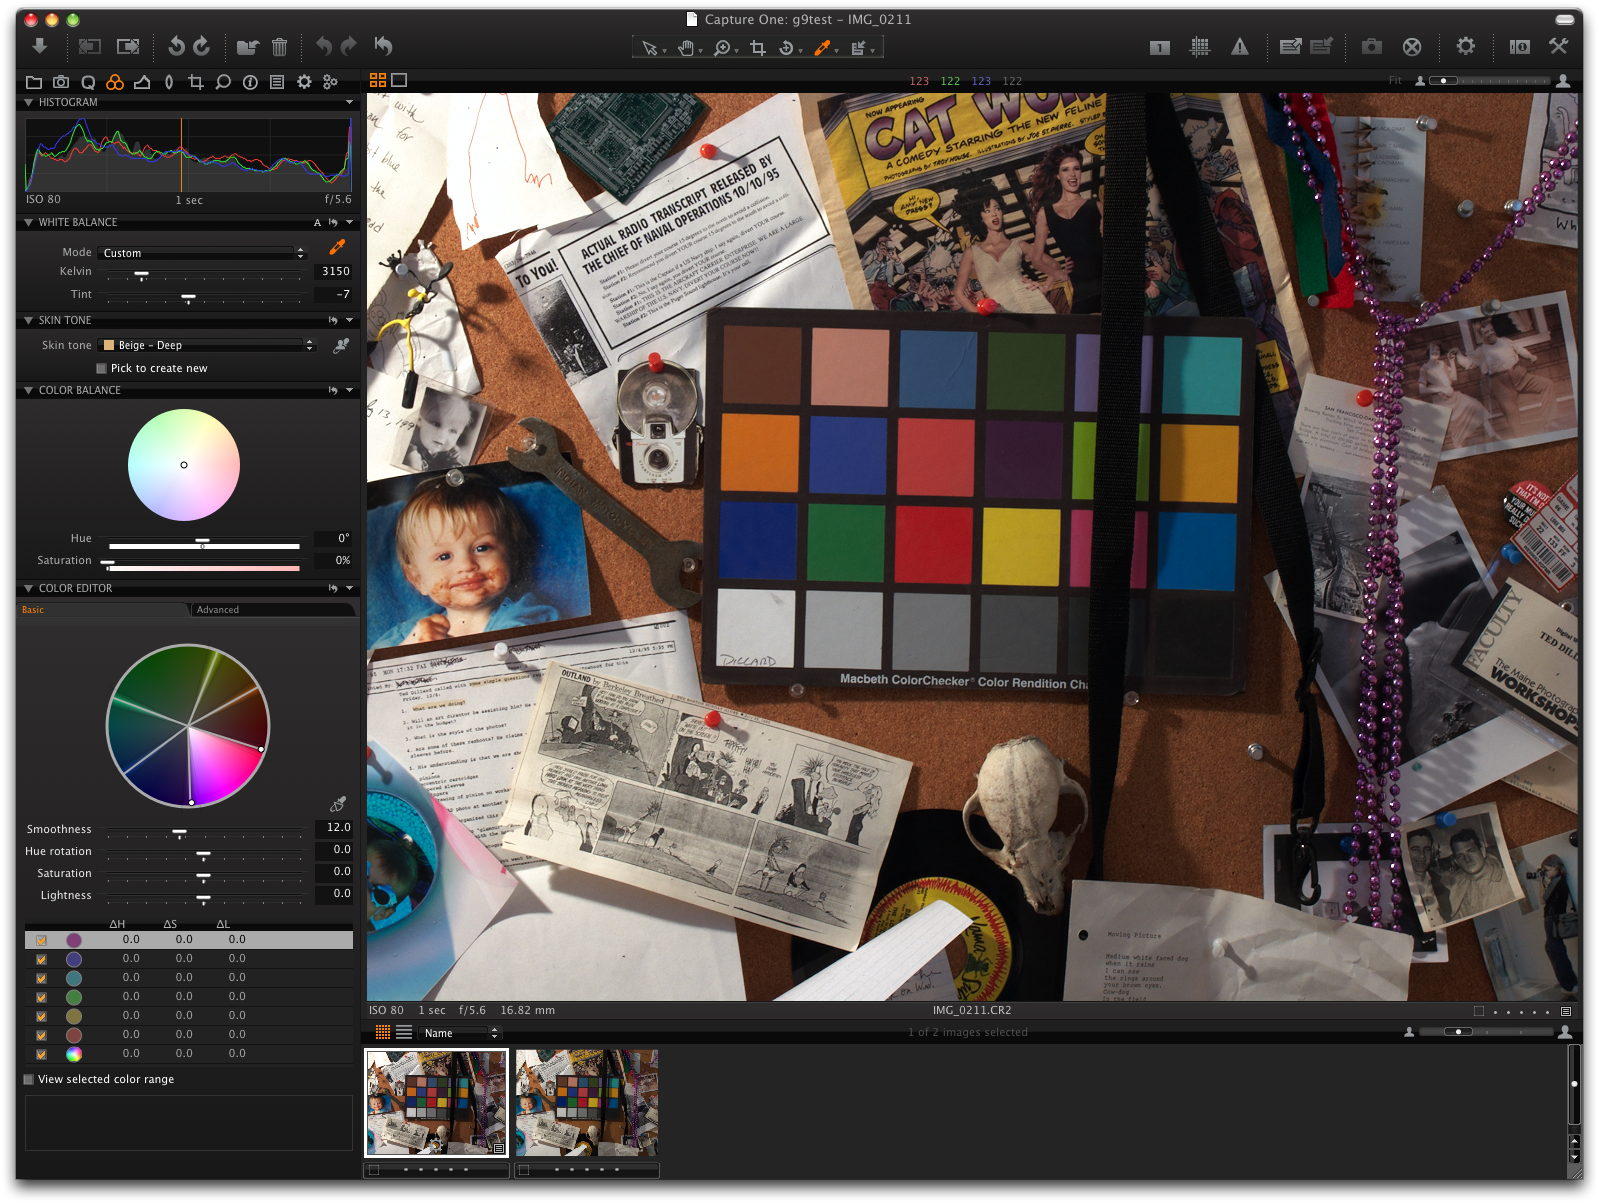
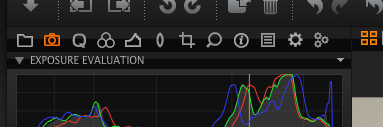
The interface was so similar to the original it was actually a surprise. Version release after version release from other companies, and you have to completely re-acquaint yourself to the locations of the tools and the workflow. The cornerstone of the PhaseOne workflow is the simple, sequential button array in the top left corner of the workspace. The feeling was like sitting behind the wheel of a new, snappy car. Everything looks sweet, and there are a whole mess of buttons you have to figure out, but the basics, like the steering wheel, gas, brake and shift are all right where they should be.

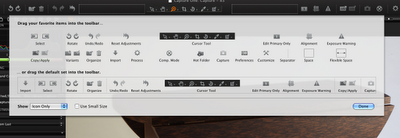
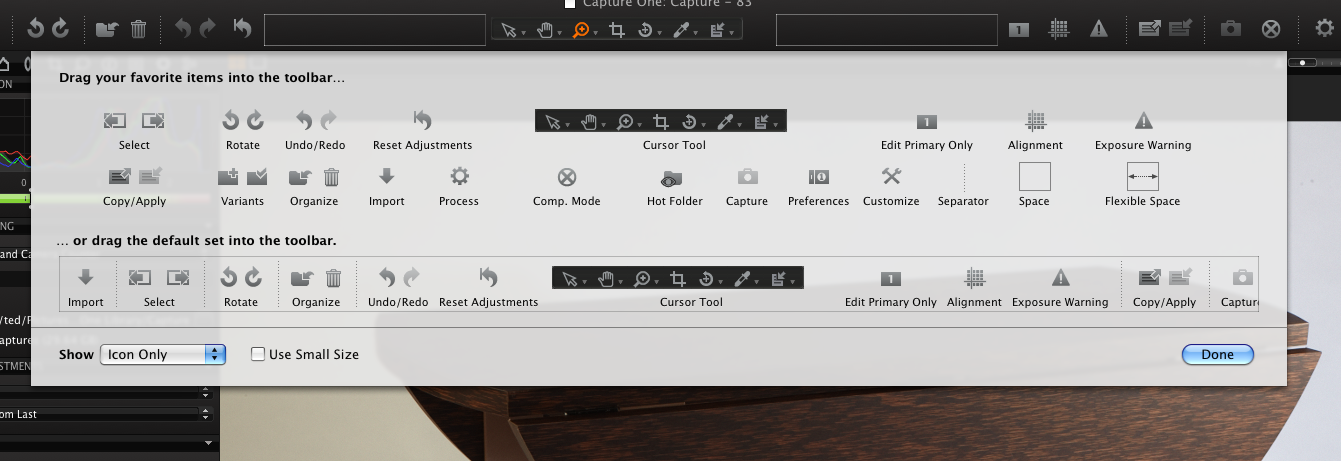
Even better, a few really handy shortcuts are easy to find, too, like the keyboard shortcuts for triggering the capture, zooming, deleting and all the other little things you need to do repetitively. It’s been a long time since I could jump on a system and look like I’d been using it for months, within about 15 minutes. If you’re fussy about the workspace, there’s a feature right out of Apple’s Aperture- click the gear in the far, upper right corner and you get this interface to customize the toolbar.
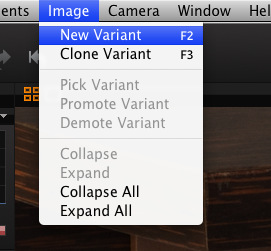
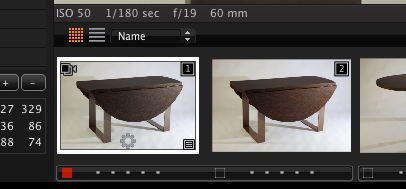
This isn’t the only feature I’m seeing here that resembles other packages. Lightroom and Aperture both have clearly made their impressions on the developers at C1Pro, and one of the most interesting places is with the use of “Variants” in processing. That is, you can make alternatives to the processing settings without creating a completely new file. Here’s how that works.
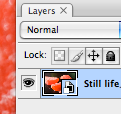
When you’ve selected a file, hit F2, or Image>New Variant.
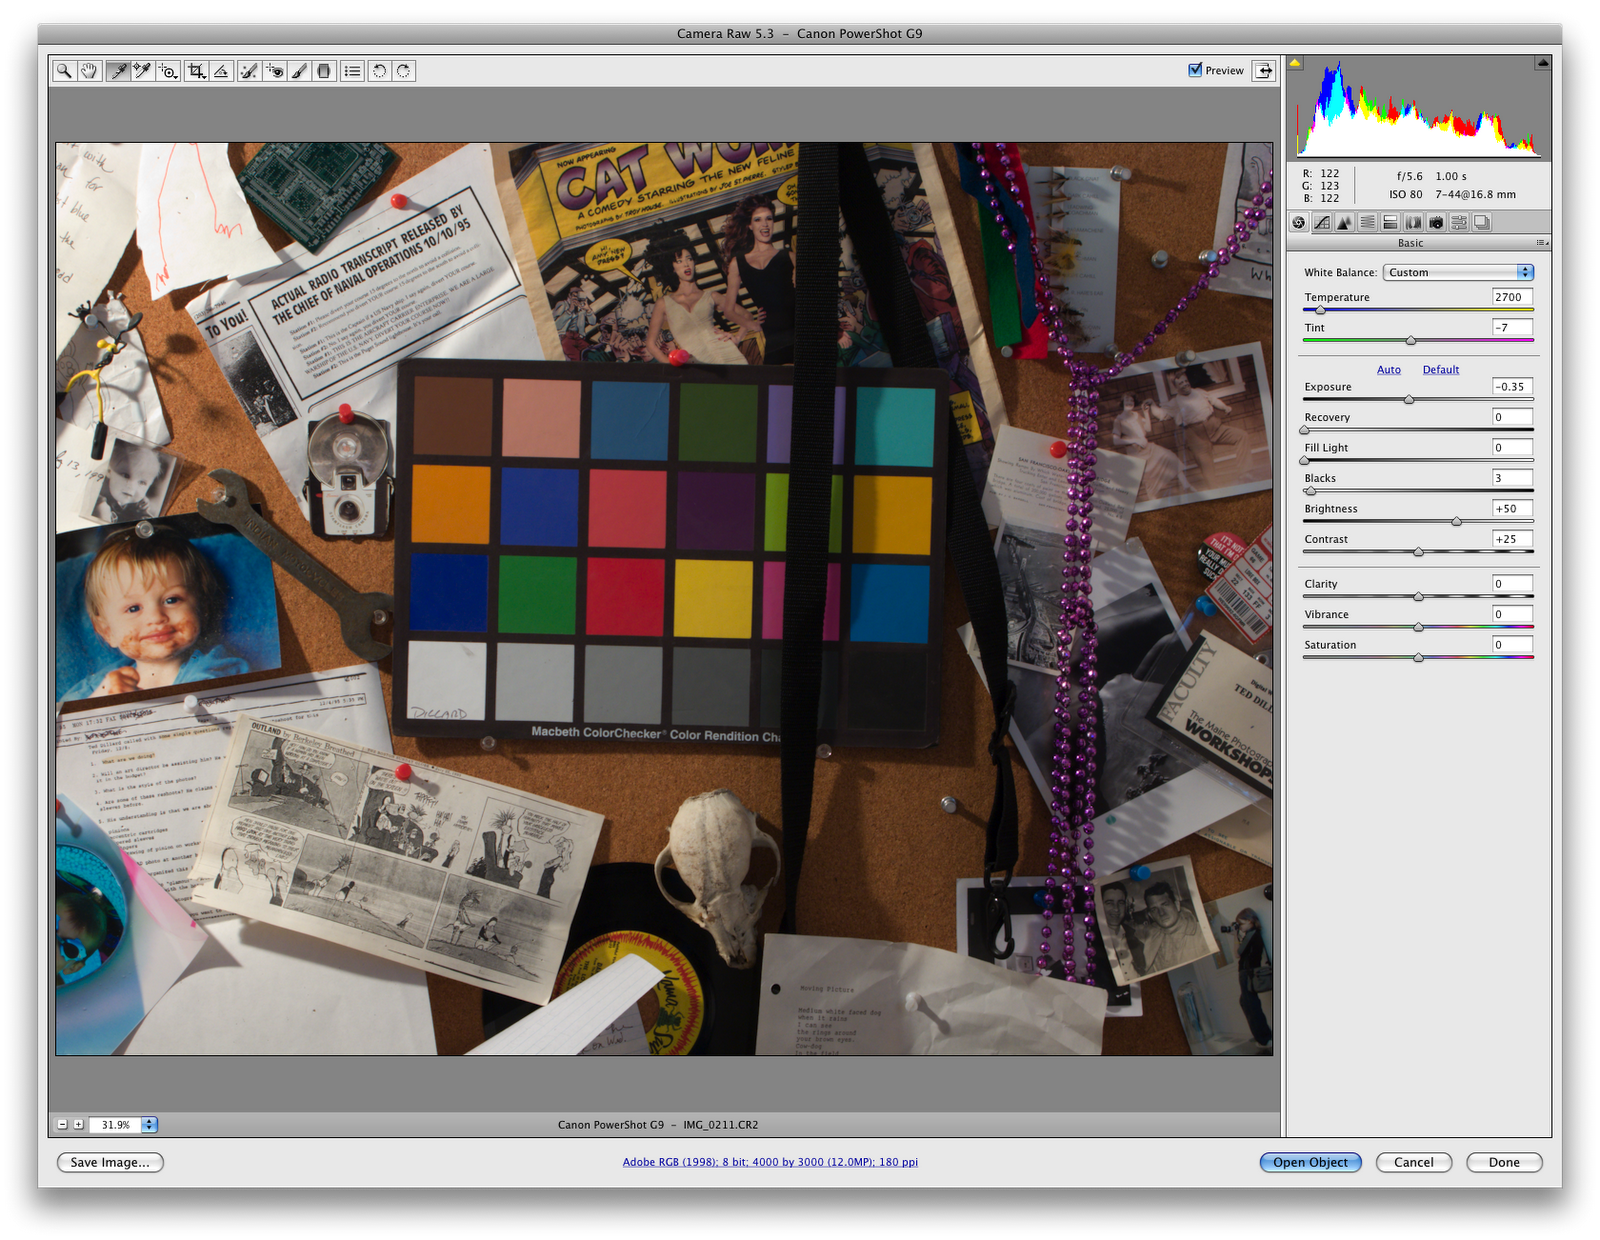
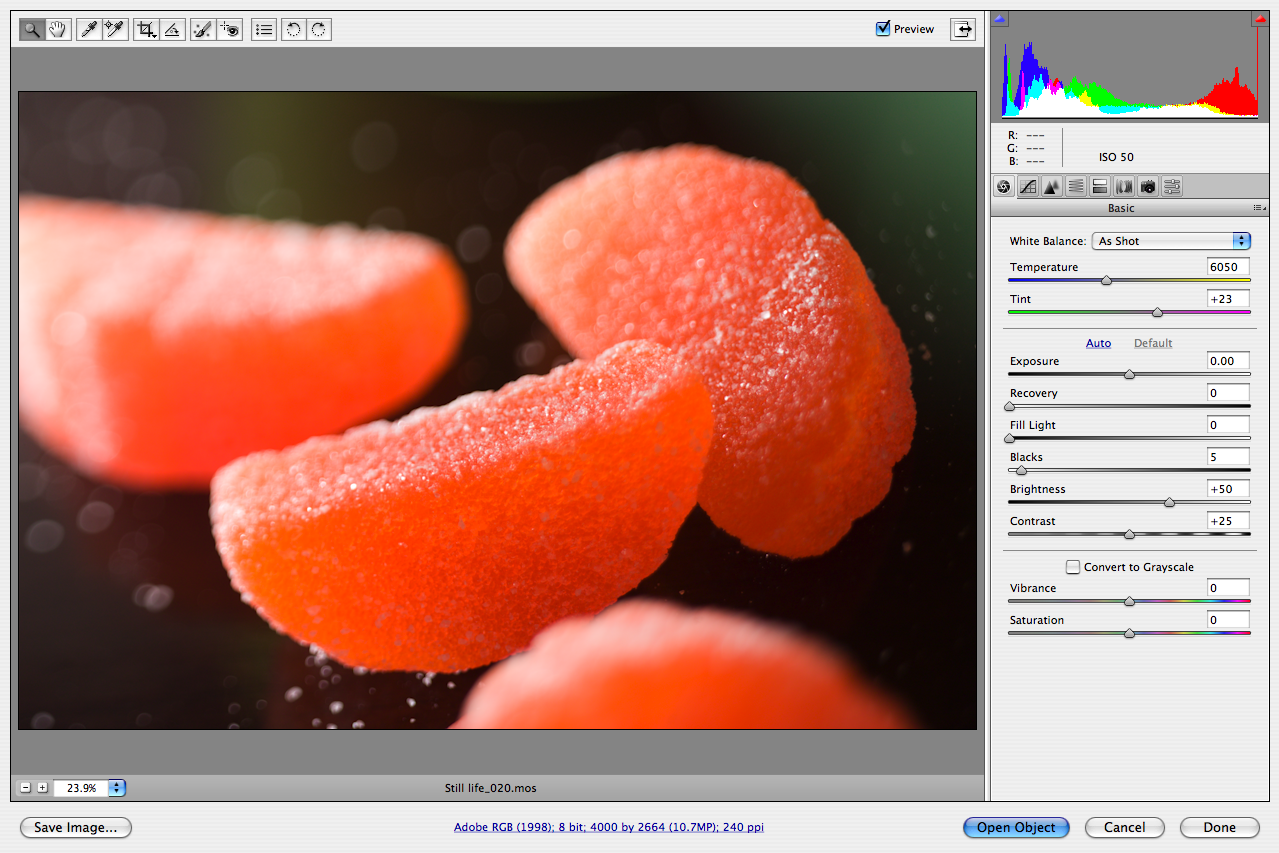
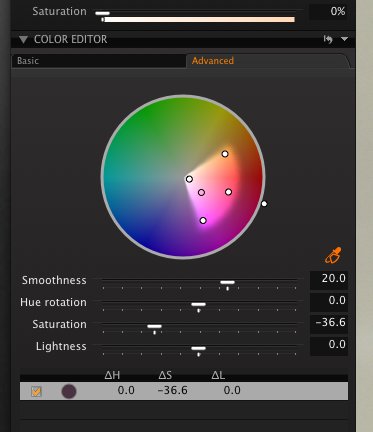
This makes a new thumbnail that you can process differently. (Here I’m showing a pretty intuitive, and powerful hue/saturation control, making a subtle change in the red-orange mapping.)
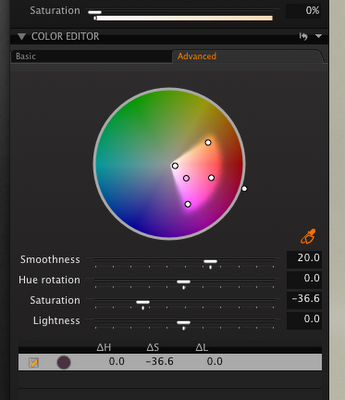
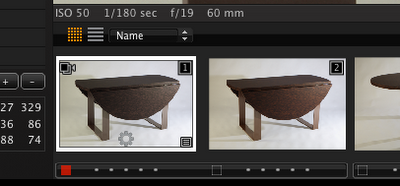
The thumbnail shows the new processing settings, and I can save out of that without having created a new RAW file with new processing settings.
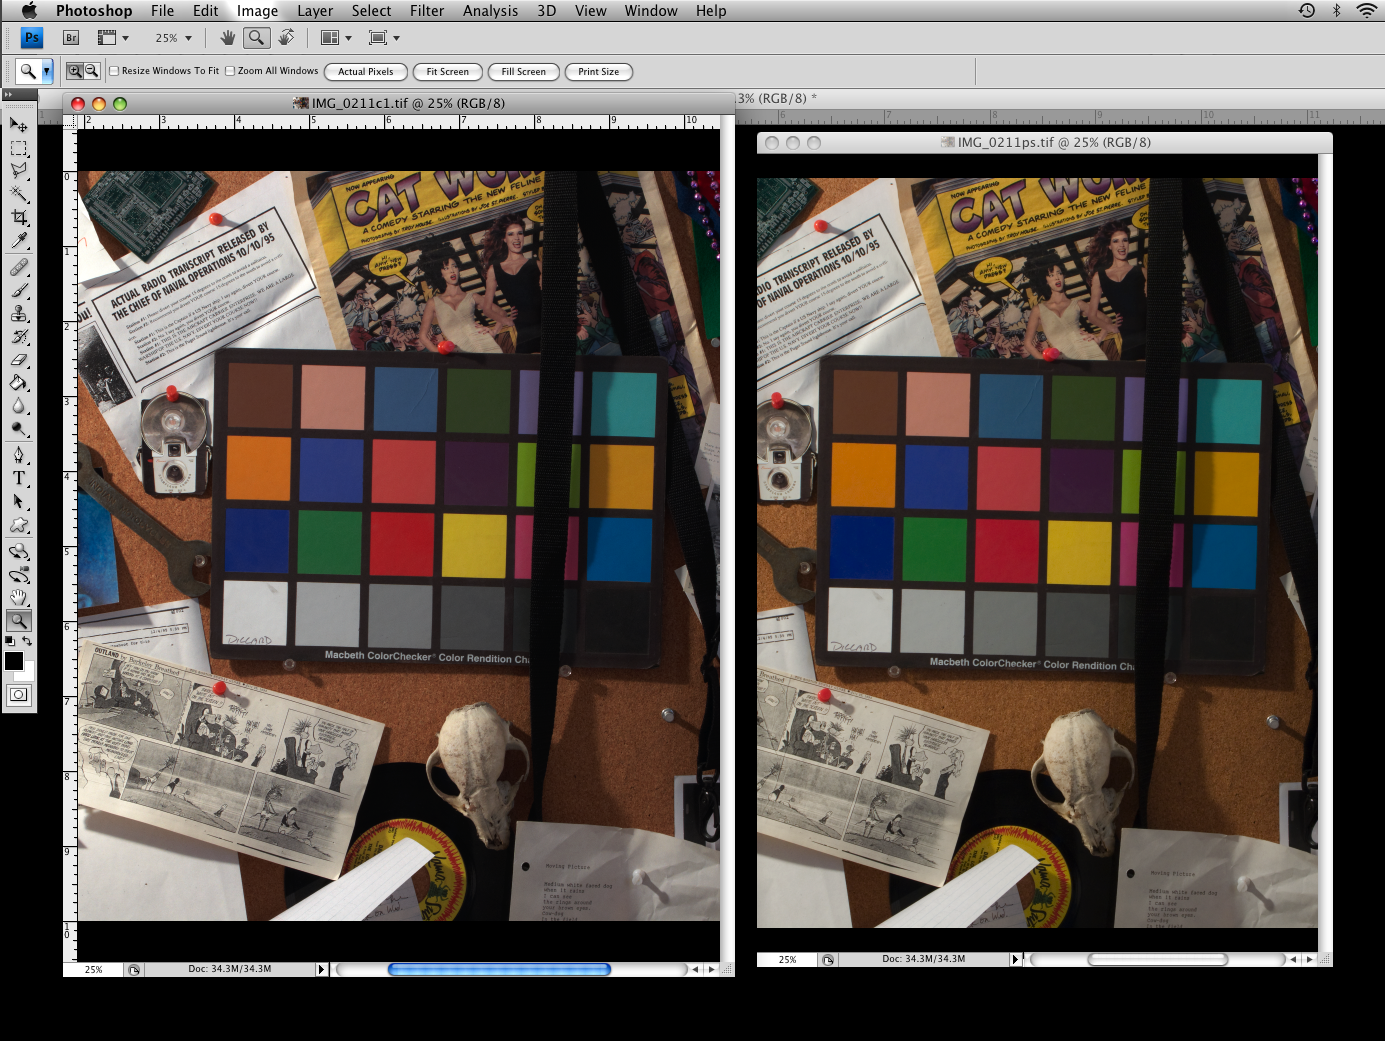
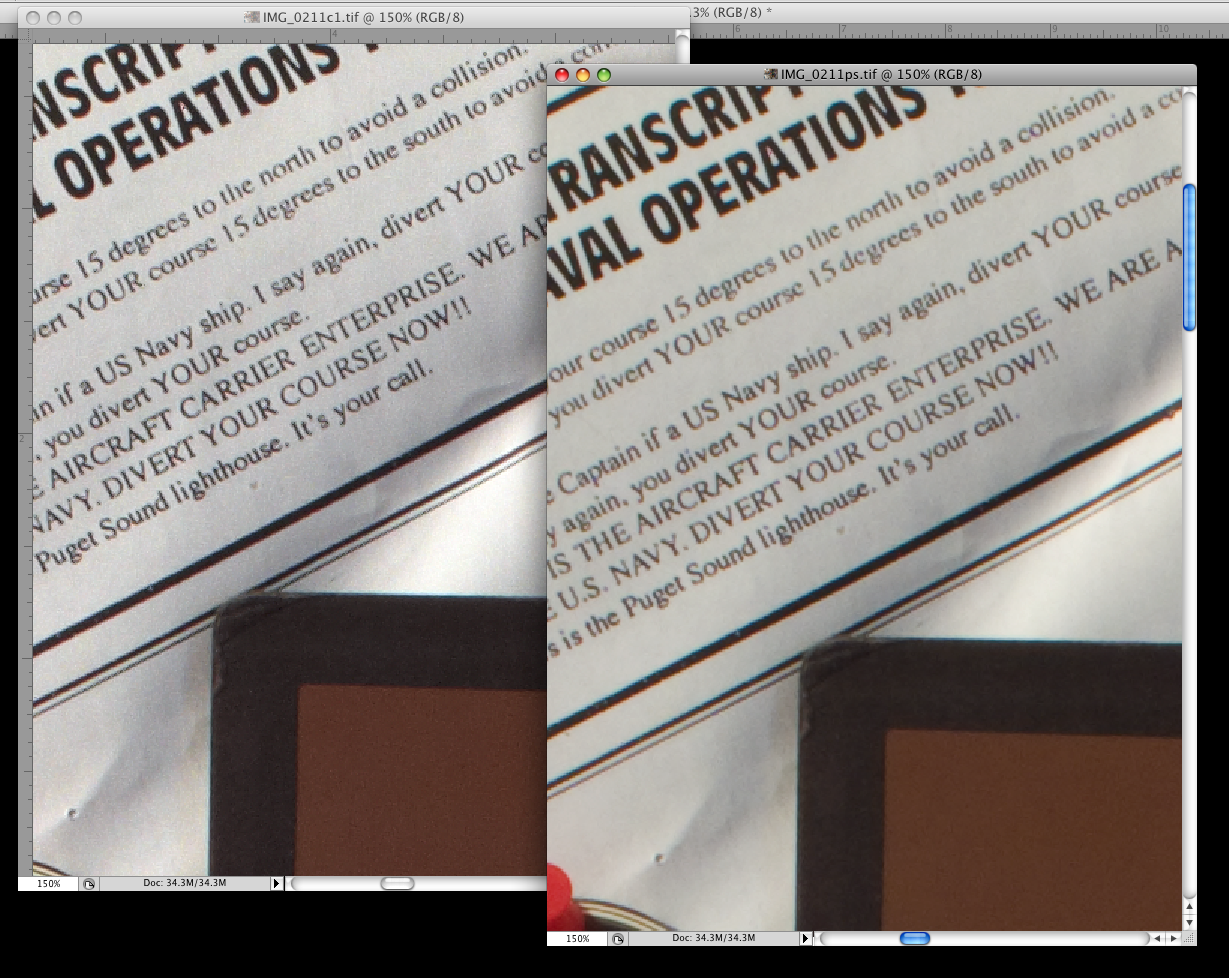
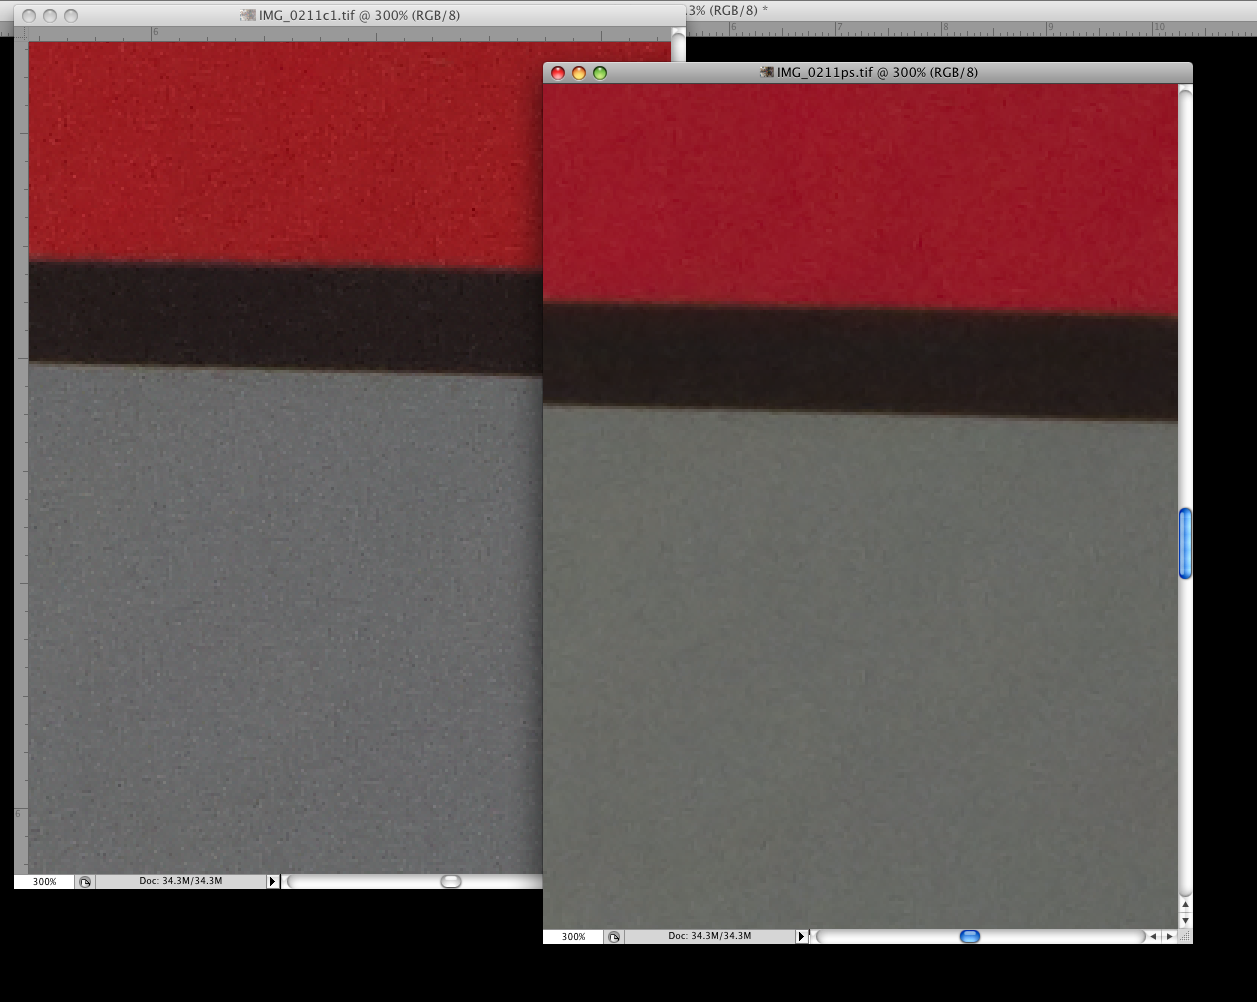
There is a ton more here. Just the briefest look around and we’re seeing some pretty sweet job organization features, processing presets, and some very nice processing standards. The files look solid coming out of C1Pro at the defaults- I did no color or contrast processing at all, other than the basic click on the Colorchecker to set the white balance.
It’s a package that has clearly been on the pulse of current offerings, responding to professional users, and is still setting the standard. More than a shooting solution, it’s a great editing package too, but needs some retouching tools, like cloning, healing, burning and dodging to really step up to where Lightroom and Aperture.
Above all, it did the single most important thing I needed it to do. I turned it on. It worked… effortlessly.
When the leading DSLR manufacturers were offering software that was billed as professional, but resembled more of a consumer product, PhaseOne saw the need to step up where the OEMs were missing the boat. They introduced C1Pro- adapting their rock-solid software to the professional DSLR market. As they had with the MF DB market, they set the bar for the camera companies, and changed workflow for everyone.
It’s been a while since I’ve taken a look at C1Pro, but I had a big shoot with a Canon 5DM2 that I needed to tether to my laptop. I thought it was a great chance to revisit C1Pro. Ironically, I was using it for the same reason I looked into it when it first came out- rather than simply process the files, I needed to shoot to the workstation with a DSLR and move fast. Photoshop couldn’t do it, the manufacturer’s software was too flakey, I needed a MF DB solution: C1Pro was the natural, well the only, choice.
Let me first say I was delighted to plug the camera in, turn it on, and immediately get a solid connection in C1Pro. I was concerned, from reports that there were issues with new operating systems (I’m running the latest version of OSX, historically, a practice that is asking for trouble with some Phase versions in the past) as well as a new camera model. Oh. Did I mention this was at the job, with the client there, with no room for error? The processing path was seamless, and easily set up to suit my standard habits.
The interface was so similar to the original it was actually a surprise. Version release after version release from other companies, and you have to completely re-acquaint yourself to the locations of the tools and the workflow. The cornerstone of the PhaseOne workflow is the simple, sequential button array in the top left corner of the workspace. The feeling was like sitting behind the wheel of a new, snappy car. Everything looks sweet, and there are a whole mess of buttons you have to figure out, but the basics, like the steering wheel, gas, brake and shift are all right where they should be.
Even better, a few really handy shortcuts are easy to find, too, like the keyboard shortcuts for triggering the capture, zooming, deleting and all the other little things you need to do repetitively. It’s been a long time since I could jump on a system and look like I’d been using it for months, within about 15 minutes. If you’re fussy about the workspace, there’s a feature right out of Apple’s Aperture- click the gear in the far, upper right corner and you get this interface to customize the toolbar.
This isn’t the only feature I’m seeing here that resembles other packages. Lightroom and Aperture both have clearly made their impressions on the developers at C1Pro, and one of the most interesting places is with the use of “Variants” in processing. That is, you can make alternatives to the processing settings without creating a completely new file. Here’s how that works.
When you’ve selected a file, hit F2, or Image>New Variant.

This makes a new thumbnail that you can process differently. (Here I’m showing a pretty intuitive, and powerful hue/saturation control, making a subtle change in the red-orange mapping.)
The thumbnail shows the new processing settings, and I can save out of that without having created a new RAW file with new processing settings.
There is a ton more here. Just the briefest look around and we’re seeing some pretty sweet job organization features, processing presets, and some very nice processing standards. The files look solid coming out of C1Pro at the defaults- I did no color or contrast processing at all, other than the basic click on the Colorchecker to set the white balance.
It’s a package that has clearly been on the pulse of current offerings, responding to professional users, and is still setting the standard. More than a shooting solution, it’s a great editing package too, but needs some retouching tools, like cloning, healing, burning and dodging to really step up to where Lightroom and Aperture.
Above all, it did the single most important thing I needed it to do. I turned it on. It worked… effortlessly.
Labels: C1, Camera RAW, RAW, RAW processing
posted by Ted Dillard at
1:02 PM
0 Comments
Links to this post
![]()
![]()