Monday, May 18, 2009

The Shoot Diary- PhaseOne C1Pro v.4

Back in the day, PhaseOne built a medium-format digital back system that set the bar. Every manufacturer- digital back and DSLR, had some variant of the basic process- control the camera, control the workflow, control the colors, process and output the files. As the systems evolved, they all began to resemble one original, and powerful package- PhaseOne Capture.

When the leading DSLR manufacturers were offering software that was billed as professional, but resembled more of a consumer product, PhaseOne saw the need to step up where the OEMs were missing the boat. They introduced C1Pro- adapting their rock-solid software to the professional DSLR market. As they had with the MF DB market, they set the bar for the camera companies, and changed workflow for everyone.

It’s been a while since I’ve taken a look at C1Pro, but I had a big shoot with a Canon 5DM2 that I needed to tether to my laptop. I thought it was a great chance to revisit C1Pro. Ironically, I was using it for the same reason I looked into it when it first came out- rather than simply process the files, I needed to shoot to the workstation with a DSLR and move fast. Photoshop couldn’t do it, the manufacturer’s software was too flakey, I needed a MF DB solution: C1Pro was the natural, well the only, choice.

Let me first say I was delighted to plug the camera in, turn it on, and immediately get a solid connection in C1Pro. I was concerned, from reports that there were issues with new operating systems (I’m running the latest version of OSX, historically, a practice that is asking for trouble with some Phase versions in the past) as well as a new camera model. Oh. Did I mention this was at the job, with the client there, with no room for error? The processing path was seamless, and easily set up to suit my standard habits.
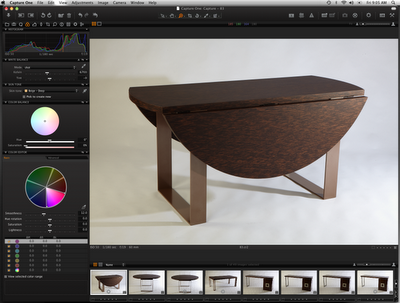


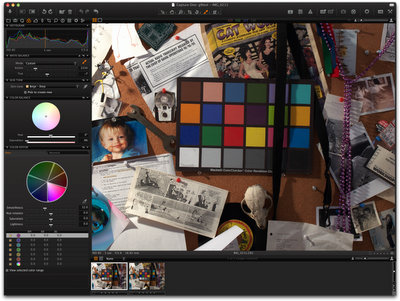
The interface was so similar to the original it was actually a surprise. Version release after version release from other companies, and you have to completely re-acquaint yourself to the locations of the tools and the workflow. The cornerstone of the PhaseOne workflow is the simple, sequential button array in the top left corner of the workspace. The feeling was like sitting behind the wheel of a new, snappy car. Everything looks sweet, and there are a whole mess of buttons you have to figure out, but the basics, like the steering wheel, gas, brake and shift are all right where they should be.


Even better, a few really handy shortcuts are easy to find, too, like the keyboard shortcuts for triggering the capture, zooming, deleting and all the other little things you need to do repetitively. It’s been a long time since I could jump on a system and look like I’d been using it for months, within about 15 minutes. If you’re fussy about the workspace, there’s a feature right out of Apple’s Aperture- click the gear in the far, upper right corner and you get this interface to customize the toolbar.
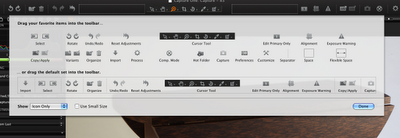


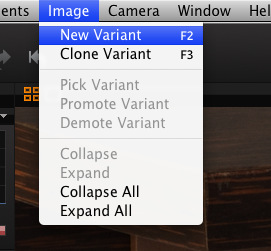
This isn’t the only feature I’m seeing here that resembles other packages. Lightroom and Aperture both have clearly made their impressions on the developers at C1Pro, and one of the most interesting places is with the use of “Variants” in processing. That is, you can make alternatives to the processing settings without creating a completely new file. Here’s how that works.

When you’ve selected a file, hit F2, or Image>New Variant.


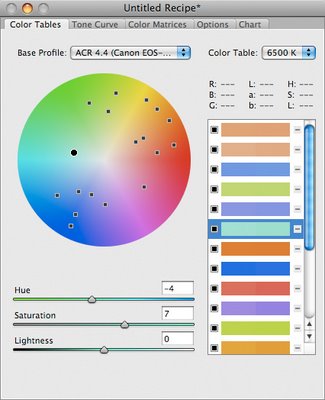
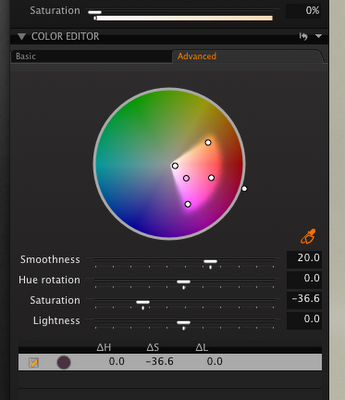
This makes a new thumbnail that you can process differently. (Here I’m showing a pretty intuitive, and powerful hue/saturation control, making a subtle change in the red-orange mapping.)


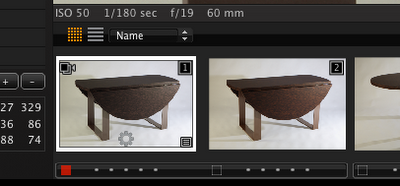
The thumbnail shows the new processing settings, and I can save out of that without having created a new RAW file with new processing settings.


There is a ton more here. Just the briefest look around and we’re seeing some pretty sweet job organization features, processing presets, and some very nice processing standards. The files look solid coming out of C1Pro at the defaults- I did no color or contrast processing at all, other than the basic click on the Colorchecker to set the white balance.

It’s a package that has clearly been on the pulse of current offerings, responding to professional users, and is still setting the standard. More than a shooting solution, it’s a great editing package too, but needs some retouching tools, like cloning, healing, burning and dodging to really step up to where Lightroom and Aperture.

Above all, it did the single most important thing I needed it to do. I turned it on. It worked… effortlessly.

Labels: , , ,

Phase One C1Pro 4 processing tests


Evaluating a RAW file processor is a slippery slope. As I'm fond of saying, the RAW file is not the "digital negative", it's more the digital "latent image", an unprocessed source of all the image information, available to the photographer to process to taste. The negative, after all, has already been processed, right? And then there's that matter of taste.

The slippery slope comes from that issue of taste... you really need to look at processing RAW files in the context of what you prefer, what you like, rather than what is "best", or "more accurate". Think about film here. If accuracy was the key feature of a film, why would we have so many different emulsions? Every film, and RAW processor, renders the photograph differently, so the key to choosing is to find the one that works best, for you.

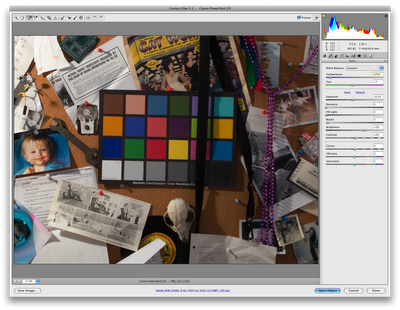
I find that I start with Adobe Camera RAW as the standard against which I measure most other processing software. It's the most common, it does a very good job making acceptable files from most cameras. The defaults are completely acceptable starting points for processing, and a good place to work from in comparing other software. My strategy is going to be to pull a test file into Camera RAW and process it at the default settings, and do the same with C1 Pro 4, and see how they compare.

I'm simply going to open the file, use the defaults, and click the gray patch on the ColorChecker to set the white point. Above, is the C1Pro screen, below is the ACR screen.


There are more differences between the two methods than I expected. Based on my last testing, I've always thought of C1 to be a fairly conservative, middle-or-the-road philosophy to file processing. Phase likes to keep to a less-saturated, by the numbers target, almost a flatter file. What I'm seeing here is a strategy more committed to the Phase philosophy- an accurate, and yet "snappy" file. Here's what I mean...


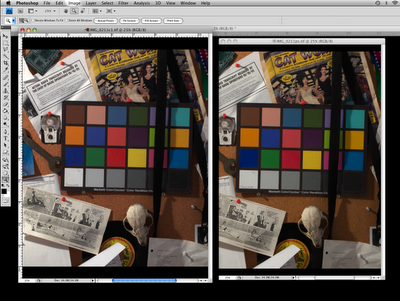
Here are my two files in Photoshop (processed as TIFFs). The first, most obvious thing we're seeing in the Photoshop file on the right, is what seems to be an overall cast of yellow, as seen most clearly in the bulletin board color. Even the grays, which I clicked as neutral, seem to be favoring a warm tone. Strangely, though, the red patch on the target looks more magenta than the C1 file- a common issue with many cameras, and one that affects skin tones... if red has a magenta shift, then Caucasian skin will not be quite so nicely rendered. The Adobe file may feel "prettier", by being warmer overall, but the Phase file seems more accurate.

I always think of music and speakers here. Do you want a speaker system that makes your favorite music sound best? ...or do you want speakers that are perfectly accurate, and reproduce the music exactly as it was recorded? The debate rages on...

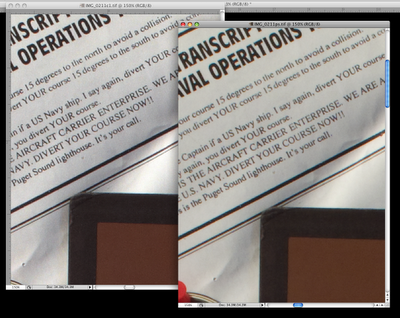
Now here is something that was a little bit of a surprise to me. These comparisons, again the Phase on the left, the Adobe on the right, show a significant difference in sharpening levels at the default.


Phase has always gone for a snappy, sharpened look. The earlier versions of C1 played this down, but it seems like they've gone back to the original premise- an aggressively sharpened file looks better at first impression than a more conservative sharpening. At least, now, you can turn it down or off. Back in the early days, you couldn't.

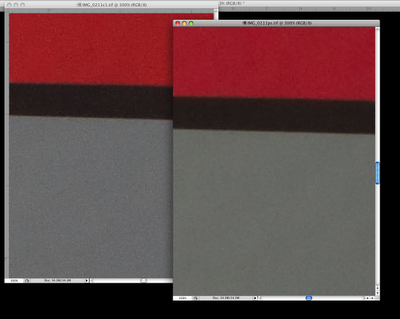
The interesting thing is that it does look nice, on type, and with fine detail. However, take a look at this. Same deal, Phase on the left.


Here's where the aggressive sharpening bites you. What should be a nice continuous tone of gray has become grainy. The file sharpening has grabbed artifacts in the file and emphasized them to the point that the file now seems to be almost noisy. For every action... you know the drill.

My conclusions? You really have to decide what package brings you closer to where you want to end up, finally. For me, in a commercial environment, I'm more concerned with how the file looks, fast, with minimal processing. Because of the color accuracy and the initial sharpness impressions, I'm certain that the client will be more impressed with the Phase files, and, of course, I can always turn the sharpening settings down. For the highest quality, non-commercial processing, I'd probably do Adobe, figuring I'm at a more flexible starting point, and I can also use my Smart Objects in the RAW workflow... but that's for files that I'll fuss over for weeks.

Phase One has done a great job. The package is now a mature, full-featured system, they've been listening to the users, and C1 Pro continues to define what a RAW processing workflow should be. Try it our yourself, they give you a 30day download, and also keep in mind every camera model will give you a little different result. What I've seen with my little Canon G9 here, you may see differently with your Nikon D700.
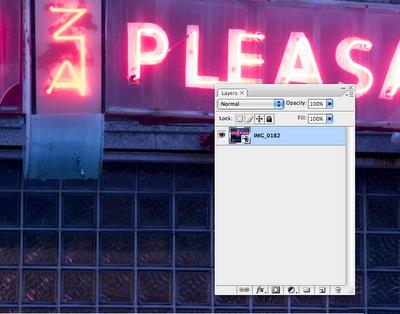
Above all, use the right tool for the job.

Phase One Capture One Pro can be downloaded, with a simple registration, here.

Labels: , , ,

Sunday, January 18, 2009

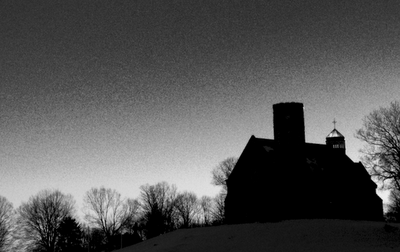
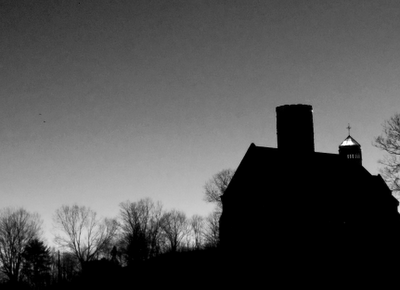
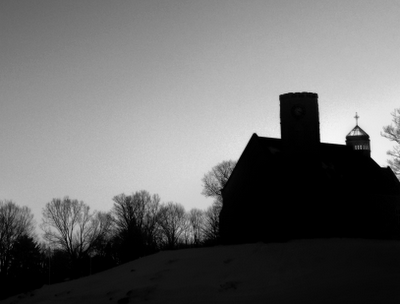
b/w conversions. Channel Mixer, Camera RAW and layered Smart Objects


B/W done with HSL/G in Camera RAW


B/W done with Channel Mixer (same results as "Black and White") adjustment.


Conversion done in Camera RAW, blended with Smart Object layers (3 layers).


Original color image...

Labels: ,

Sunday, November 30, 2008

Adobe DNG Profile Editor


As I've mentioned, CS4 Camera RAW 5.2 gives you some additional Camera "Profiles" in the Calibration tab. Still in beta, Adobe has the DNG Profles Editor which lets you take a DNG file, presumably converted from a native RAW file format, and make very specific adjustments to how it is rendered. You can then import that "recipe" right into the Camera RAW "Camera Profiles" menu.

Here is the Adobe Labs site, with some good instructions and links to the Editor.

Labels: , , ,

Wednesday, November 26, 2008

Update: Camera RAW 5.2

ok, this is VERY cool stuff.


More than simply adding camera support for new models, we have three nice new features, too. We get, found in the Workflow Options, an output sharpening tool. This is a nice feature that lets you work fast, and process and sharpen files for a particular purpose right in Camera RAW, rather than adding a sharpen step in Photoshop. If you "Save Images" right in Camera RAW, it lets you give it some sharpening before saving. I'm not to clear on exactly how that sharpening is applied...


Second, we have a "Targeted Adjustment Tool". This is sweet. This lets you click and drag a specific tone up or down. Want the shadows lighter? Click the shadows, drag the cursor up.

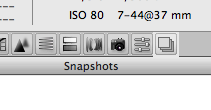
Finally, we get a Snapshots panel, giving us a history of sorts... something that is going to change much of the way we can work in Camera RAW.


There's also a set of additional camera "profiles" I have to look at in the Camera Calibration tab...

I guess plans for my weekend are clear... hours to spend exploring the new stuff, but it really is a great update!

The Adobe page:
Camera Raw 5.2 update
November 25, 2008
Windows | Macintosh

here.

Labels: , ,

Saturday, October 4, 2008

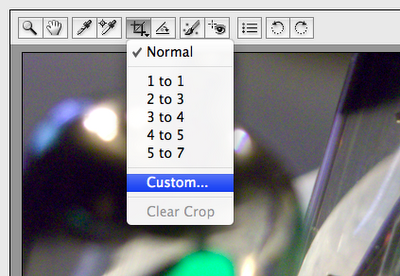
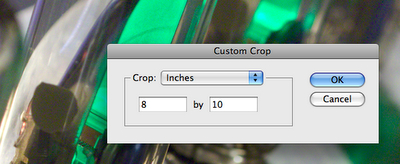
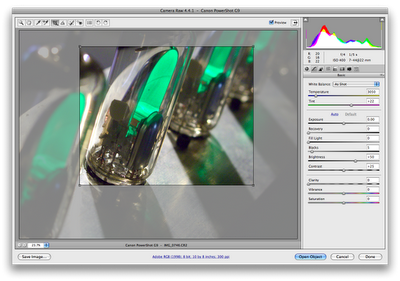
Cropping in Camera RAW


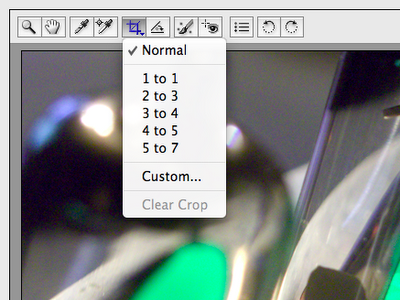
Go to the Crop Tool.

Select "Custom".


Set parameters of croppage.


Set crop.


Now, when you process the file you get that crop. The crop gets saved in the RAW metadata, the XMP file. If you re-open and want to change the crop, go right ahead... if you want to clear it, just hit "esc" when you're in the Crop Tool.

Labels: , ,

Sunday, September 28, 2008

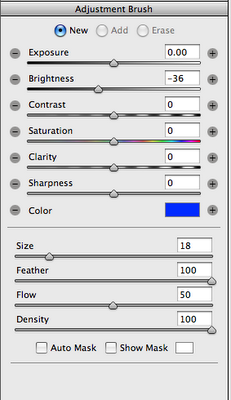
CS4- Camera RAW Adjustment Brush, update


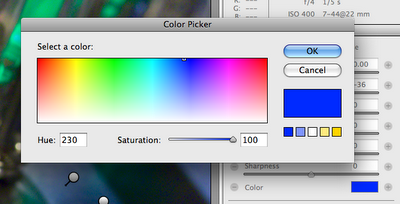
So, I said the color adjustments were limited. They're not.

Click on the color patch and you get this. Everything you could ever want.

(Straight out of Lightroom 2, btw, no surprise there.)

Labels: , , ,

Tuesday, September 23, 2008

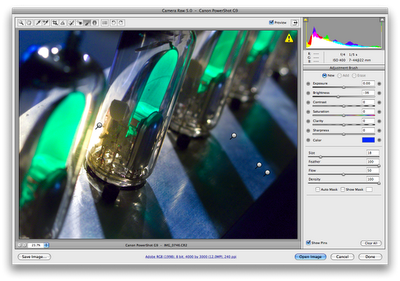
CS4- Camera RAW Adjustment Brush


Here it is, guys... This is a Brush tool that, in Camera RAW, allows you to selectively apply limited color and fairly decent tone and density corrections.

VERY cool stuff, and exactly what I, for one, was looking for!

Labels: , , ,

Wednesday, June 25, 2008

Setting up Camera RAW for Smart Objects


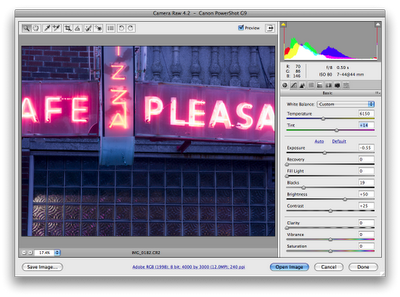
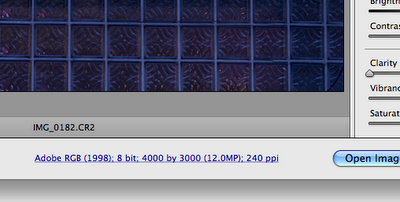
We need to get to Adobe Camera RAW to set that up to open files as Smart Objects rather than standard rasterized images. To do this, just get to a RAW file and open it (preferably using Bridge). Here’s the familiar Camera RAW window. At the very bottom in the middle is what looks like a link on a website. Here’s what mine looks like:


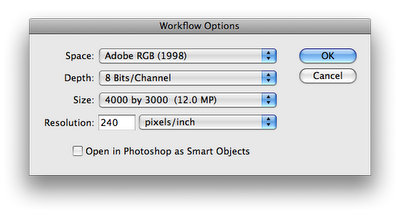
Click it. This brings you to the Camera RAW “Workflow Options”.


Here you can specify some of the key processing preferences, specifically, the Working Color Space you’re asking Camera RAW to process to, the bit depth, pixel dimensions and resolution of your processed files. There’s also a little checkbox: “Open in Photoshop as Smart Objects”. We want to check that little guy.


You’ll notice, after you hit OK, that the “Open …” button now has changed from “Open Image” to “Open Object”. After you make your basic adjustments in the Camera RAW menus, hit this button and you’ll kick into Photoshop.

Here’s your happy workspace, with your image (now temporarily named “'filename' as Smart Object”) and your Layers Palette that you’ve set up, and the background layer with this funny little icon on the layer. THAT, my friend, is your Smart Object.


Now, whenever you open a RAW file it will go into Photoshop as a Smart Object Layer. The enormous power of this is revealed when you go and double-click that funny little icon. Go ahead. Try it. You know you want to. Bingo! What happens is you get right back to that Adobe Camera RAW window. All we really have done is set it up so we can go and edit the RAW file, and re-edit it, without having to get back out of Photoshop and start again with the original file. We now have a RAW file embedded into our Photoshop file as a layer.

Seems simple enough, this is the “nut” of the process, but, as the saying goes, “Mighty Oaks from Little Acorns Grow”.

Lets see what this lets us do. More to come...

Labels: , , ,