Sunday, November 30, 2008

Adobe DNG Profile Editor


As I've mentioned, CS4 Camera RAW 5.2 gives you some additional Camera "Profiles" in the Calibration tab. Still in beta, Adobe has the DNG Profles Editor which lets you take a DNG file, presumably converted from a native RAW file format, and make very specific adjustments to how it is rendered. You can then import that "recipe" right into the Camera RAW "Camera Profiles" menu.

Here is the Adobe Labs site, with some good instructions and links to the Editor.

Labels: , , ,

Tuesday, November 4, 2008

DNG Petition, Call for camera support for DNG

Please show your support for Adobe's development of the DNG format as a universal, open file, and for camera manufacturers including DNG as an option for shooting and storing files, by clicking this link: http://www.PetitionOnline.com/dng01/petition.html .

From the Adobe DNG site: ( http://www.adobe.com/products/dng/ )

Raw file formats are becoming extremely popular in digital photography workflows because they offer creative professionals greater creative control. However, cameras can use many different raw formats — the specifications for which are not publicly available — which means that not every raw file can be read by a variety of software applications. As a result, the use of these proprietary raw files as a long-term archival solution carries risk, and sharing these files across complex workflows is even more challenging.

The solution to this growing problem? The Digital Negative (DNG), a publicly available archival format for the raw files generated by digital cameras. By addressing the lack of an open standard for the raw files created by individual camera models, DNG helps ensure that photographers will be able to access their files in the future.


It is time that the major camera manufacturers, in particular, Canon and Nikon as industry leaders, acknowledge and support Adobe's initiative as an industry standard, for the good of the photographic community.

Labels: , ,

Saturday, October 4, 2008

Cropping in Camera RAW


Go to the Crop Tool.

Select "Custom".


Set parameters of croppage.


Set crop.


Now, when you process the file you get that crop. The crop gets saved in the RAW metadata, the XMP file. If you re-open and want to change the crop, go right ahead... if you want to clear it, just hit "esc" when you're in the Crop Tool.

Labels: , ,

Sunday, July 27, 2008

Adobe LiveDocs pages

This is Adobe's encyclopedia of Photoshop information.

It's where I go to get the "micro" view of Photoshop details. Sometimes it's incredibly helpful, sometimes not so much. (Example: The "Stack Mode" explanations may make sense to some programmer somewhere, they don't mean crap to me...)

The search engine is kind of random too. I often just goog what I need and then try to find the "livedocs" reference.

Labels: , ,

Wednesday, June 25, 2008

Setting up Camera RAW for Smart Objects


We need to get to Adobe Camera RAW to set that up to open files as Smart Objects rather than standard rasterized images. To do this, just get to a RAW file and open it (preferably using Bridge). Here’s the familiar Camera RAW window. At the very bottom in the middle is what looks like a link on a website. Here’s what mine looks like:


Click it. This brings you to the Camera RAW “Workflow Options”.


Here you can specify some of the key processing preferences, specifically, the Working Color Space you’re asking Camera RAW to process to, the bit depth, pixel dimensions and resolution of your processed files. There’s also a little checkbox: “Open in Photoshop as Smart Objects”. We want to check that little guy.


You’ll notice, after you hit OK, that the “Open …” button now has changed from “Open Image” to “Open Object”. After you make your basic adjustments in the Camera RAW menus, hit this button and you’ll kick into Photoshop.

Here’s your happy workspace, with your image (now temporarily named “'filename' as Smart Object”) and your Layers Palette that you’ve set up, and the background layer with this funny little icon on the layer. THAT, my friend, is your Smart Object.


Now, whenever you open a RAW file it will go into Photoshop as a Smart Object Layer. The enormous power of this is revealed when you go and double-click that funny little icon. Go ahead. Try it. You know you want to. Bingo! What happens is you get right back to that Adobe Camera RAW window. All we really have done is set it up so we can go and edit the RAW file, and re-edit it, without having to get back out of Photoshop and start again with the original file. We now have a RAW file embedded into our Photoshop file as a layer.

Seems simple enough, this is the “nut” of the process, but, as the saying goes, “Mighty Oaks from Little Acorns Grow”.

Lets see what this lets us do. More to come...

Labels: , , ,

Saturday, April 12, 2008

updates: Adobe Camera Raw 4.4.1 and Lightroom 1.4.1

information about the updates and links to all at the Adobe site
here.

direct links:
Lightroom(Mac, Win), Camera Raw(Mac, Win)

Labels: , , , ,

Wednesday, April 2, 2008

Adobe Photoshop Lightroom 2.0 Beta

site here.
New stuff (from the site):
* Localized corrections — Enhance specific areas of an image for unsurpassed nondestructive flexibility and control reminiscent of the traditional darkroom dodge and burn experience.
* Improved organizational tools — Find the images you need quickly and easily.
* Multiple monitor support — Add an additional monitor to efficiently manage photographic workflow and presentation.
* Flexible print package functionality — Create custom layouts containing multiple sizes of a photograph on a single page.
* 64-bit support — Lightroom 2.0 now takes advantage of the latest hardware architectures with improved memory handling and performance.

Smart Collections are now available. Specify the criteria for a smart collection and images will be automatically added to the collection if they meet the criteria.


bring it ON baybee!

Labels: , ,

Friday, March 28, 2008

Adobe Express: bah.


All I really care about:

1. Just JPEGS. No RAW, no TIFF, nuthin.
2. Slower than crap to do anything. And I got me FIOS baybee.
3. Did you SEE that agreement? The worst thing is, most consumers wouldn't even care. SHAME on you, Adobe.

On the other hand:

1. VERY interesting idea of web-based editing program.
2. A REALLY nice beginners interface. Better than any free thing with any little camera I have seen. Canon and Epson, for example... really good work on that part Adobe.
3. Great for Grammy, except for the SLOW thing. NOT for ANY pro application I can see.

This has been fun. Lets get back to work now...

Labels: , , ,

Adobe Express Terms of Service: Just Dumb

The Adobe Terms of Service Agreement:
"Adobe does not claim ownership of Your Content. However, with respect to Your Content that you submit or make available for inclusion on publicly accessible areas of the Services, you grant Adobe a worldwide, royalty-free, nonexclusive, perpetual, irrevocable, and fully sublicensable license to use, distribute, derive revenue or other remuneration from, reproduce, modify, adapt, publish, translate, publicly perform and publicly display such Content (in whole or in part) and to incorporate such Content into other Materials or works in any format or medium now known or later developed."

Their response to complaints on the forum:
"Statement for Terms of Service Issues:
We've heard your concerns about the terms of service for Photoshop Express beta. We reviewed the terms in context of your comments - and we agree that it currently implies things we would never do with the content. Therefore, our legal team is making it a priority to post revised terms that are more appropriate for Photoshop Express users. We will alert you once we have posted new terms.

"Thank you for your feedback on Photoshop Express beta and we appreciate your input.

-Adobe Photoshop Express Team"

Labels: , , ,

Thursday, March 27, 2008

Adobe Express (beta): web-based photo editing application

The Adobe Express page.
...there's a test drive button at the bottom, no membership required. (You do need the latest Flash player for the site to work, at least with Firefox, though... v9 I think.)

The Photoshop Express Help (and info) page here.


Who knows... the shape of things to come?

Labels: , , ,

Thursday, March 20, 2008

Lightroom updated... or not.

This, from the Adobe Lightroom 1.4 update site:

Adobe Photoshop Lightroom 1.4 update

The Lightroom 1.4 update has been temporarily removed from the Adobe.com web site in order to allow time for additional investigation into several bugs that were discovered after the update was released. At this time, we recommend uninstalling Lightroom 1.4 and installing Lightroom 1.3.1.


More info here:
http://blogs.adobe.com/lightroomjournal/

Labels: , ,

Wednesday, March 19, 2008

Aperture2 vs Lightroom

Nods to David Schloss, who is part of the Aperture User Professional Network, found here: http://apertureprofessional.com/ here is a probably pretty complete list of what Aperture does that Lightroom does not.

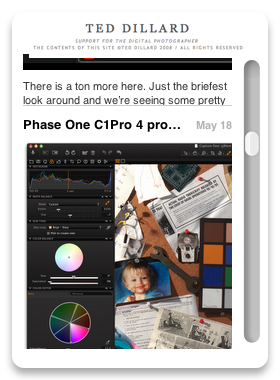
...and yes, I'm starting to get a little gleeful. No jumping up and down quite yet, though...

"These are the ones off the top of my head, I’m sure I’m missing some.
I’ll break this down into Aperture features in general (1.5 and before) and then 2.0 features. These are sort of in an off-the-top-of-my-head order.
Aperture, General
File Management and workflow
—-—-—-—-——-
• Ability to move files around to any location via the Aperture interface, copying, moving and relocating files as you do so.
• Direct integration with iLife and iWork applications—all Aperture projects are available in all Apple iLife and iWork programs via the Media Browser for drag/drop use in creative process. For example, drop images from Aperture projects into your Podcasts created in Garageband. Drop multiple photos into Keynote to create slideshows with work (especially cool with new Smart Builds). Sync images from Aperture to your iPhone automatically. Drop photos right into Pages documents. All of this happens without having to ever export a file. The Media Browser just gives direct access to your Aperture (and iPhoto) projects, smart albums and images.
• Dual-monitor support for side-by side extension of the workspace. For example, display browser on one screen and full-size image on second display.
• Onscreen soft proofing of color space for output.
•Ability to send email attachments of images in any format at the click of a button.
• Non-modal interface that doesn’t require jumping into a mode to develop images, a mode to adjust them, etc. Ability to perform adjustment or metadata tasks at any time.
• Automatic web upload to .Mac account.
• Automator and Applescripting.
• Light table layout mode for image preview and previewing.
Interface
——-
• Loupe – resizeable, moveable loupe that pulls data from original raw file, allowing zoom of up to 1600% on an image. The loupe can also display color data and values, and is used for pixel-level precise color sampling for tools like White-Balance and Color. (As opposed to the “Loupe” in LR that’s simply a zoom mode.
• Configurable layout that allows for the rotation or swapping of position of browser and viewer, and resizing of interface elements. Interface elements can be toggled off to expand view (see Aperture 2.0 for more changes to this) and HUD use for non-invastive palettes that can be toggled on and off and repositioned.
• Hierarchical keywords – Nested-multi-layer keyword support for assignment and search of images.
• Keyword buttons and drag/drop – Keywording allows for drag-drop keywords onto multiple images, or assignment (and removal) of keywords via button sets.
• Smart Albums – Create albums based on search criteria that automatically update as images match those criteria. (For example,
• Smart Web Albums – Web albums automatically created via smart search criteria.
• List tool that displays images as a sortable list based on EXIF/IPTC attributes.
• Custom IPTC and metadata view modes.
• Customizable metadata overlay available for Viewer, Browser and as a tooltip (with two different display modes for each).
Editing/Adjusting
—-—-—-
• Batch change of all metadata at once.
• Ability to lift and stamp
• Raw fine tuning controls that adjust the baseline tonal curve of the imported raw file, and allow for a camera-model level adjustment to be applied.
• Highlight and shadow tool.
• Edge sharpen tool.
• Straighten tool (enhanced in 2.0) that both straightens and crops images.
Output
——
• Print presets allowing for instantaneous printing to specified printers using pre-saved print output settings, paper types, and color management settings.
Content Creation
—-—-—-
• Books and prints – Custom books or prints ordered directly through Aperture interface, delivered right to you. (Sizes from 4×6 to 20×30)
Backup
——
• Vault – One click backup of Library to multiple drives at once.
Aperture 2.0
—-—-
File Management and Workflow
—-—-—-—-——
• New Raw 2.0 engine, which gives the RAW Fine Tuning tool a Hue Boost slider and Moire adjustments.
• Tethered shooting with Nikon and Canon cameras.
• Task pausing via Activity display
Interface
——-
• Quick Preview mode, which can use either an Aperture generated or camera-generated preview for display on screen. (By default, btw, Lightroom is showing you just a preview, by default Aperture is showing you the raw data.
• Customize keyboard settings for any Aperture tool and menu item.
Editing/Adjusting
—-—-—-
• Edit plug-in architecture
• Display of hot and cold points.
• Custom color sampling tool for adjustments of precise colors in an image. (In addition to any CMY, RGB point)
• Events view (a la iPhoto) allowing you to view all projects by rollover thumbnail vies.
• Vignette tool that does exposure or brightness.
• Healing tool that allows for repair of contiguous parts of the image, not just a single dust spot.
Output
——
• Print sharpening
• 16-bit printing support to HP and Epson printers.
• Custom book sizes to any size (that you can print or save as PDF)
• Web 2.0 gallery that syncs automatically to Aperture project so that people can upload images to the gallery and have the sync on the back end."

Labels: , , ,

Saturday, March 15, 2008

Understanding How Rendering Intents Work

(...an excerpt from the coming book, "Color Pipeline", coming this Fall)

Rendering Intents are, essentially, the logic used in remapping color into a smaller color space. The two basic rendering intents that we are dealing with are Perceptual and Relative Colorimetric.

Perceptual intent presumes that you want to keep the relationships between all the colors, that is, if you have colors that appear different, we want to keep that appearance when they are remapped. Converting colors with Perceptual Intent requires that we move all the colors in the space around a bit. I like to make an analogy to a sponge, or a balloon. Perceptual intent kind of squishes the sponge up, and the entire sponge changes shape a little.

Relative Colorimetric intent is more of a cookie-cutter effect. If colors are outside of the smaller space they are moved to the closest color inside the space. All the colors inside the space remain untouched. If, in the conversion, the colors being remapped lose their relationship to each other, that is, lose their “spacing”, well, so be it.

Here are some examples. I went back to our color burple, and made a couple of other colors… blue, burple and purple. Here they are, sitting well outside the Epson Premuim Luster color gamut (shown very lightly shaded).

The next illustration shows the three colors mapped into the gamut of Premium Luster using Perceptual Intent. You can see that the distances between the three are almost exactly the same, and they’ve been moved around a little. This is to maintain our perception of them, and their relationship to each other.

The final illustration shows the same colors mapped in using Relative Colorimetric Intent. As you can see, they are closer together, they are mapped directly into the gamut just to the nearest available color, with little concern for maintaining any relationship between them.

So when do you use which one? Keep in mind that with Perceptual Intent everything gets changed… Relative Colorimetric, only the colors that need to change get changed. There’s your answer.

You use Perceptual Intent when you need to make some big changes in your gamut, and the “look” of the colors is important. For example, if you have a full, rich blue and purple image and you are printing it to Premium Luster you may want to use Perceptual Intent so that the colors will print with the same differences and “spacing” you’re seeing in AdobeRGB, but get mapped into the colors that the printer can work with.

Relative Colorimetric Intent is really handy when, for the most part, all of your colors are inside the printer gamut, and only a few, like our burple, aren’t playing nice. We don’t need to push everything around just to get burple in there, we just need to push it in, and leave everything pretty much as it sits.

This is a great case of, if you know where your colors fall, and you know what your gamut is, you can make the best choice about how the system is going to convert the colors and keep as much of the image intact.

Labels: , , , ,