Fun with Automator- Convert RAW to DNG (very nerdy)
Here's what I wanted. I want to download my card to my Desktop and have the RAW files inside processed to DNG for my backup. Automagically.
It really seemed simple enough, but I was thinking the "Hot Folder" approach, making a folder that, when you drop stuff into it, it activates a program. This required more skill in scripting than I have, or at least will admit to.
Ben Long, however, has put together an Automator action that starts up Adobe DNG Converter, and that is where we start. Automator is a free Apple program that allows guys like me to work with scripting as a drag-and-drop interface. They say it's all easy and stuff, but I found it pretty mystifying. Here's a walkthrough on how I made an Automator Application. Using this, I can simply drop my folder on the application icon and it does what I want- well, mostly.
Let's start with exactly what I want to do. I want to plug my card in to my computer and download the files to my desktop. I then want to drop those files onto something that will crank out DNG files and leave my original RAW files alone. Then I can just collect my files and store them away.
The first step is to go to the site with the Automator Action, that's here. Download it, open the .zip file, double-click on the "Convert Raw to DNG.action" and it will ask you if yo want to install it. Say "Install".
Now go to Automator. (Applications>Automator) You'll get this window, select Custom.
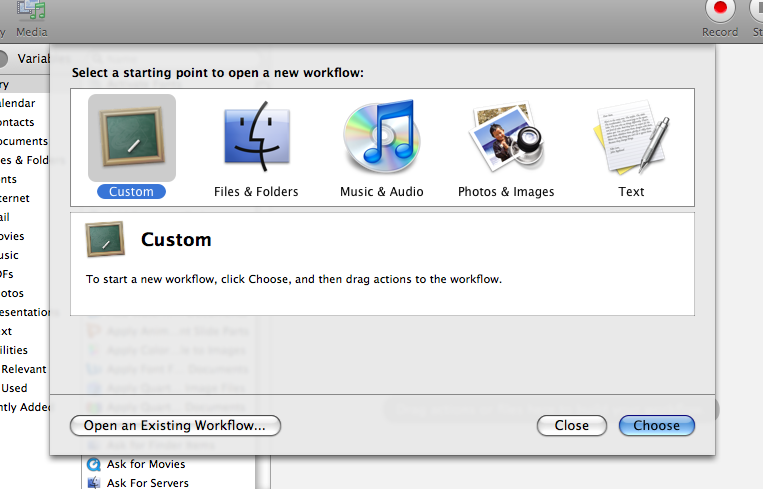
Here you have what is described as an intuitive interface. Uh. Maybe it is to some, I didn't really get it right away. On the left you have Actions, or things you can do. You grab them and assemble the Workflow on the right. As far as what I know how to do, the Actions aren't editable, so you get what you get. Ben Long, obviously, knows how to make and edit them... Here I've selected Photos, then I see Ben's Action. I've selected it and dragged it to the right side.
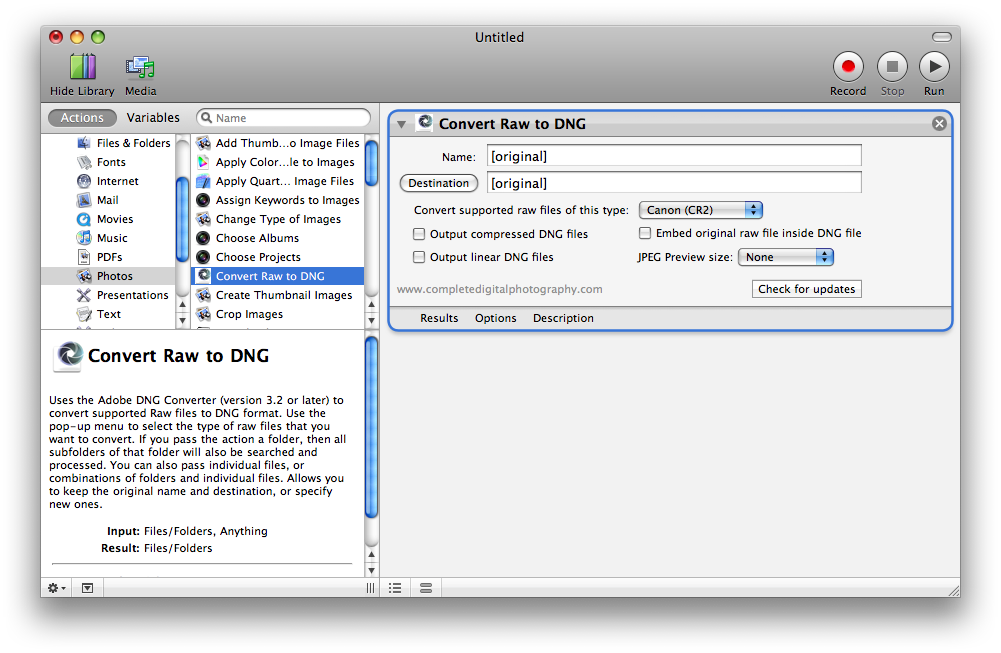
This Action is actually running Adobe DNG Converter, so you have to control it with the fields here. I've set up a folder for receiving my files, called DNG Out, and selected it here. If you leave everything else alone it will not rename or move your files.

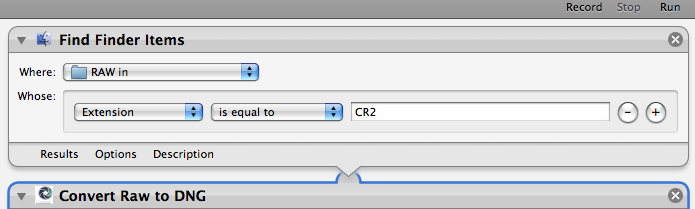
The thing nobody really spells out is how you run this thing. Well, first you have to tell it what to run, so we're going to add a folder. Go back to the left side of Automator and pick Files and Folders, and select and drag Find Finder Items to the top of the right side. Now tell it where to look. I made a "RAW in" folder on the desktop and pointed it at that. (Select "other" from the pulldown.)
I also told it to look for .CR2 files, my camera's RAW files. Here's the whole window.
Now. If I go File>Save As, I get this window. If you select "Application" in the dropdown, rather than "Workflow", you'll get a neat little application icon.


All you have to do to use it is to drop your new camera files (usually in the default folder, 100CANON, in my G9's case) into the"RAW in" folder, grab the whole "RAW in" folder and drop it on that icon. Your original files will be sitting in the camera folder, your converted DNG files will be processed out to the DNG out folder. Now I just have to move the files into my storage folders... depending on how I've set that up, of course.
Hopefully this is enough of a tease to get you going using Automator a bit more. It's really kind of, er, fun (total nerd, I know...), and I went on to make a process that makes a new dated folder and duplicate my original RAW files into it to help me file the stuff away... but that's enough for now.
The Automator site is here, with all sorts of help.
For what it's worth, here's my little application, and here's the fancier one. I'm presuming you need Ben's Action installed for this to work, and I take no responsibility if it makes your computer disappear in a puff of smoke. You can open them in Automator and see what makes them work.
Labels: Automator, conversion, DNG, nerdy, RAW
posted by Ted Dillard at
9:56 AM
0 Comments
Links to this post
![]()
![]()