GEEKZONE: The Rosenholtz-Sanchez Effect Explained
(...a little tease from Smart Object Pipeline)
We’ve been talking about this effect, what is it, really?
There are a couple of ways that Smart Object Layers seem to compound an adjustment. Basically, this applies to copying a layer that you’ve applied an adjustment with a mask to.
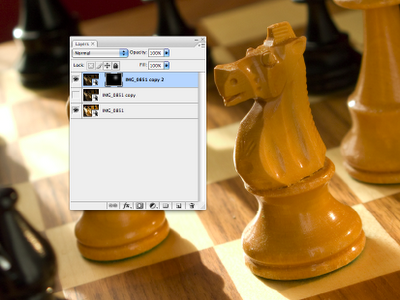
If I start with a layer, then make another Smart Object on top of it, I’ll get a solid, self-contained layer that has edits that only apply to itself.

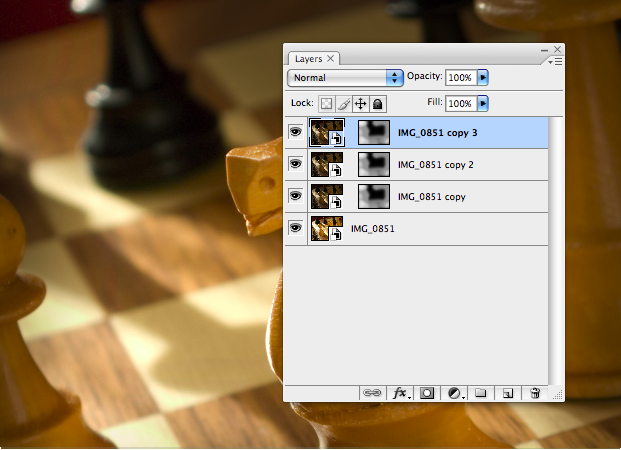
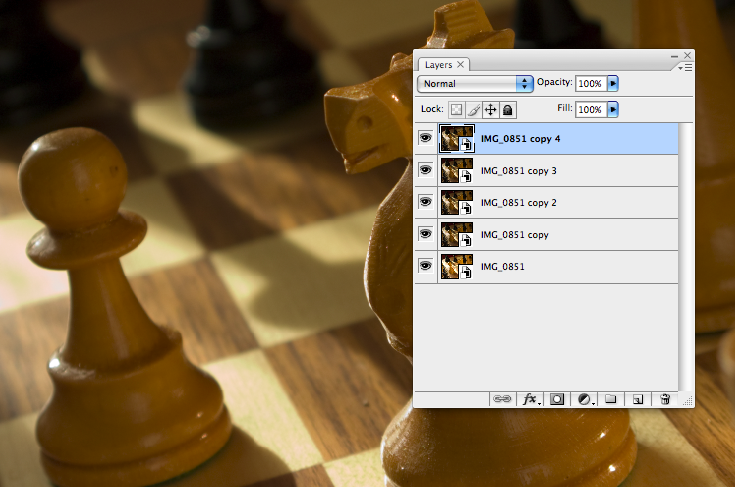
In this case I’ve adjusted it darker, to burn down the perimeter. Now, I make a mask, and “burn” down the areas I want. If I now copy that layer, it will appear to compound the adjustment, making it darker still. If I keep copying the latest, top layer, it just keeps getting darker and darker. Here’s what three iterations of that looks like:

It’s simple really. Each “Smart Object via Copy” move uses the source layer as it’s starting point, and applies that to the overall image. The moral of this story? Be really careful of which Smart Object you’re copying, and how it’s propagating adjustments. To be safe, I usually copy only from the first, or Background layer.
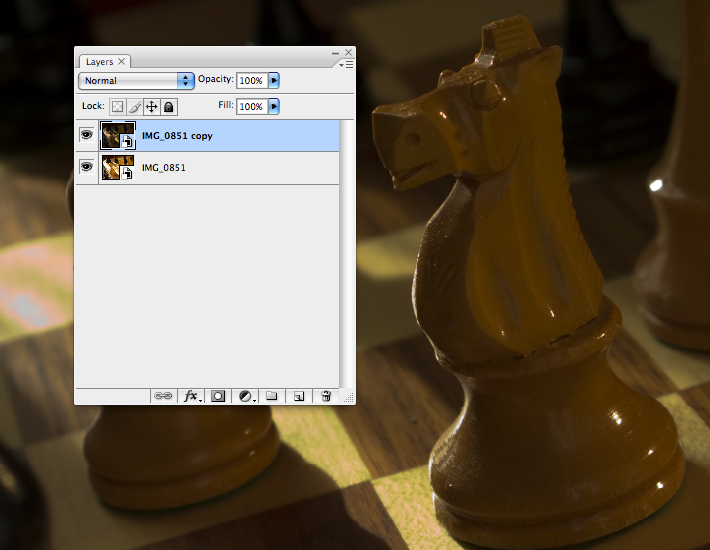
Something is fishy here, though. If you make a straight, unmasked darker Smart Object layer and make several copies on it, you’ll notice it doesn’t get any darker. If the edits get compounded, then why isn’t this compounding here? Go ahead, try it.

Here’s a basic “dark” move, copied a bunch of times. The result is no darker than the first edit.
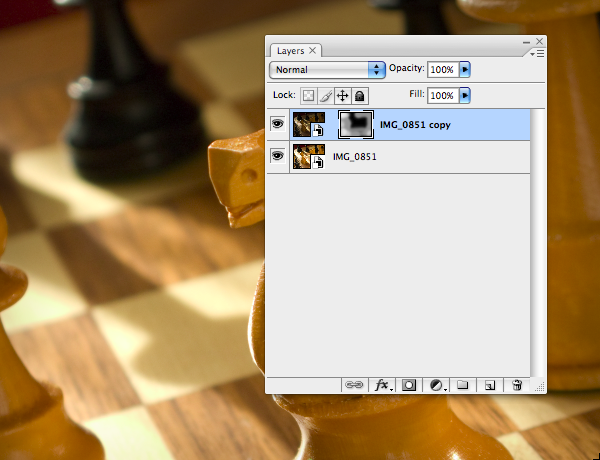
Here’s the thing. The “Smart Object via Copy” move compounds the mask, not the edit. Here’s a basic image, and a very dark adjustment on top.

Now I’m going to hold that back (by turning it off for the moment) and make a copy with a mask, using my standard 50% flow and 50% opacity settings, and I’m just going to hit it lightly. Here’s what it looks like.
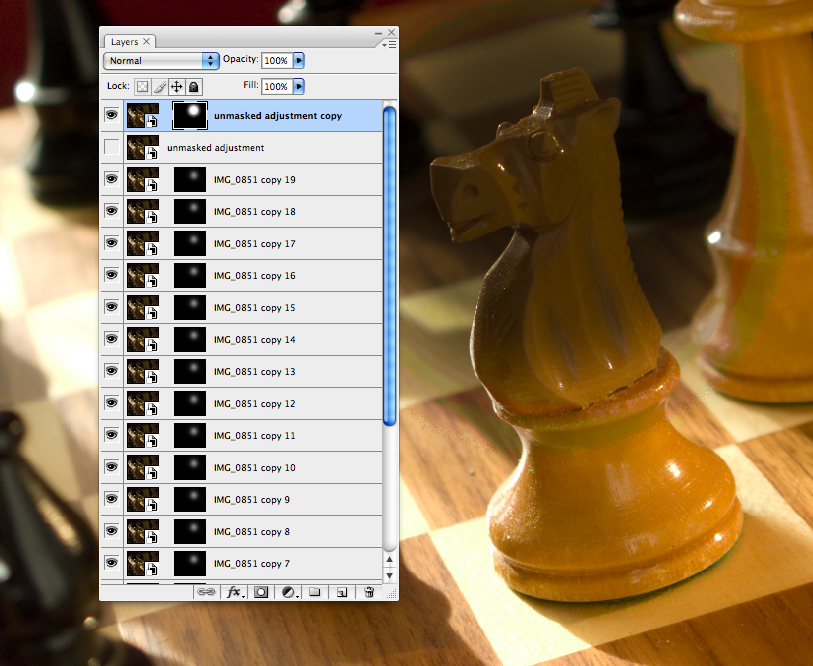
(I named it “unmasked adjustment” to keep it straight.) OK, I just hammered out a bunch of copies of the masked layer until it didn’t get any darker. After 19 layers, I have the same tonal value as the unmasked layer. (Here’s the 19th layer,
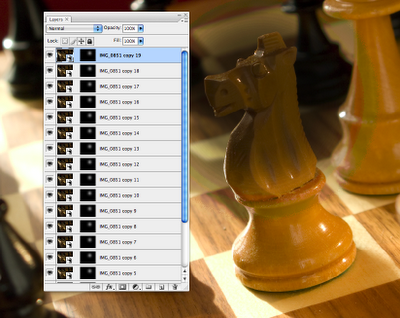
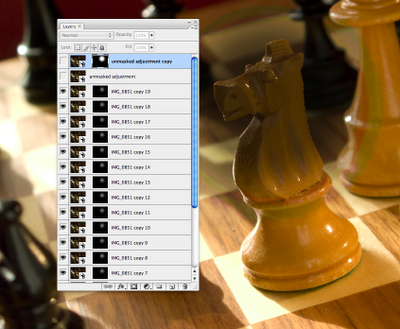
and here’s the dark layer moved to the top.)
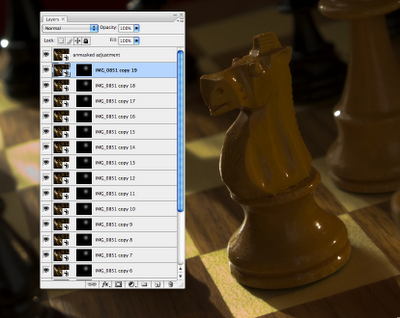
Each “Smart Object Layer via Copy” move compounds the mask, moving it to more and more transparent… it basically is like painting on it with the 50%/50% brush over and over, 19 times in fact, until it shows 100% of the Smart Object it’s masking.
Want to see something funny? Here
is what my 19 copies looks like. Here

is what it looks like when I hit my mask 19 times with the same 50%/50% brush setting. The spread of the mask is a little different, but the density of the edit is the same.
It feels, when you’re working with Smart Objects and Smart Filters in a masking workflow, like there is some magical mechanism going on and the edits, filters and adjustments you’re making can get out of control.
Keep this in mind. It’s not magic, it’s the mask.
We’ve been talking about this effect, what is it, really?
There are a couple of ways that Smart Object Layers seem to compound an adjustment. Basically, this applies to copying a layer that you’ve applied an adjustment with a mask to.
If I start with a layer, then make another Smart Object on top of it, I’ll get a solid, self-contained layer that has edits that only apply to itself.
In this case I’ve adjusted it darker, to burn down the perimeter. Now, I make a mask, and “burn” down the areas I want. If I now copy that layer, it will appear to compound the adjustment, making it darker still. If I keep copying the latest, top layer, it just keeps getting darker and darker. Here’s what three iterations of that looks like:
It’s simple really. Each “Smart Object via Copy” move uses the source layer as it’s starting point, and applies that to the overall image. The moral of this story? Be really careful of which Smart Object you’re copying, and how it’s propagating adjustments. To be safe, I usually copy only from the first, or Background layer.
Something is fishy here, though. If you make a straight, unmasked darker Smart Object layer and make several copies on it, you’ll notice it doesn’t get any darker. If the edits get compounded, then why isn’t this compounding here? Go ahead, try it.
Here’s a basic “dark” move, copied a bunch of times. The result is no darker than the first edit.
Here’s the thing. The “Smart Object via Copy” move compounds the mask, not the edit. Here’s a basic image, and a very dark adjustment on top.
Now I’m going to hold that back (by turning it off for the moment) and make a copy with a mask, using my standard 50% flow and 50% opacity settings, and I’m just going to hit it lightly. Here’s what it looks like.

(I named it “unmasked adjustment” to keep it straight.) OK, I just hammered out a bunch of copies of the masked layer until it didn’t get any darker. After 19 layers, I have the same tonal value as the unmasked layer. (Here’s the 19th layer,

and here’s the dark layer moved to the top.)

Each “Smart Object Layer via Copy” move compounds the mask, moving it to more and more transparent… it basically is like painting on it with the 50%/50% brush over and over, 19 times in fact, until it shows 100% of the Smart Object it’s masking.
Want to see something funny? Here

is what my 19 copies looks like. Here
is what it looks like when I hit my mask 19 times with the same 50%/50% brush setting. The spread of the mask is a little different, but the density of the edit is the same.
It feels, when you’re working with Smart Objects and Smart Filters in a masking workflow, like there is some magical mechanism going on and the edits, filters and adjustments you’re making can get out of control.
Keep this in mind. It’s not magic, it’s the mask.
Labels: Mask, Rosenholtz-Sanchez, Smart Filters, Smart Objects
posted by Ted Dillard at
10:45 AM
1 Comments
Links to this post
![]()
![]()